


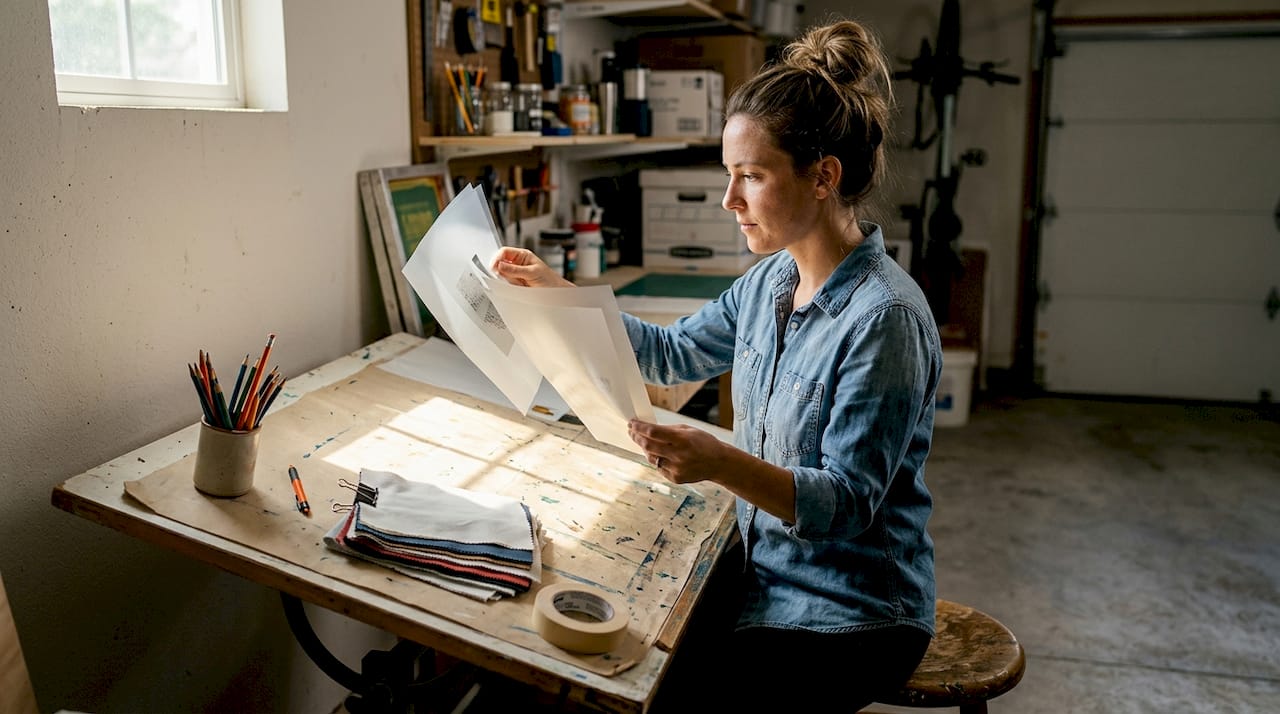
Running a custom apparel operation without a clear production system is expensive. You waste time chasing down errors, reprinting garments, and managing equipment that breaks at the worst moment. Many businesses face high costs and wasted hours with in-house custom apparel production. Outsourcing your DTF transfers removes most of that friction. This guide walks you through every stage of a proven DTF workflow, from design prep to quality control, so you can produce better apparel with less stress and stronger margins.
Table of Contents
- Why streamline your custom apparel workflow?
- Essential tools and materials for outsourced DTF success
- Design and order preparation: Setting up for flawless transfers
- Applying DTF transfers: Step-by-step workflow
- Quality control and troubleshooting for repeat success
- Scaling and optimizing your DTF workflow
- Take the next step: Fast-track your custom apparel workflow
- Frequently asked questions
Key Takeaways
| Point | Details |
|---|---|
| Simple setup | Outsourcing DTF transfers requires only a heat press, saving you money and space. |
| Quick turnaround | You can complete each DTF transfer in under 2 minutes, enabling efficient batch production. |
| Fewer errors | A streamlined workflow with provider-prepared transfers helps minimize costly mistakes. |
| Durable results | Properly applied DTF transfers last through 50 or more washes without fading. |
| Scale with your business | Outsource for low-to-mid volumes, but consider in-house for higher order sizes. |
Why streamline your custom apparel workflow?
A disorganized workflow costs you more than time. Reprints, inconsistent quality, and slow turnaround all eat into your profit margin and damage your reputation with customers. Fixing the process upstream, before a single garment is pressed, is where the real gains happen.
Outsourcing your DTF transfers gives you the benefits of outsourcing DTF without the overhead of owning and maintaining a printer. You skip the ink costs, the film waste, the calibration headaches, and the learning curve. What you get instead is a ready-to-press transfer that arrives at your door.
Here is what a streamlined outsourced DTF workflow delivers:
- Lower startup costs with no printer, RIP software, or ink system to buy
- Consistent quality on every run, regardless of batch size
- Risk-free design testing on small runs before committing to bulk orders
- Faster turnaround because you skip the production bottleneck entirely
- More time to focus on sales, design, and customer relationships
The custom transfer advantages are especially clear for small-batch runs. Outsourcing DTF enables minimal equipment needs, scalability, and higher margins compared to in-house production at low volumes.
“The best workflow is the one you can repeat without thinking. Build your system around the steps that never change, and let your provider handle the rest.”
Pro Tip: Start by mapping out your current production steps on paper. You will almost always find two or three redundant steps you can cut immediately.
Now that you have seen the value of streamlining, it is critical to understand what you will need to set up a workflow that works for your operation.
Essential tools and materials for outsourced DTF success
One of the biggest advantages of outsourcing is how short your equipment list becomes. You do not need a $10,000 printer setup. Outsourcing requires only a heat press, PET film transfers, and basic prep materials to get started.
Here is your core checklist:
- Heat press (clamshell or swing-away, 15x15 minimum recommended)
- Blank garments pre-washed and lint-rolled
- Pressing pillow or foam pad for even pressure on seams and pockets
- Teflon sheet or parchment paper to protect the transfer surface
- Lint roller for garment prep
- Thermometer or temp gun to verify platen accuracy
See the full DTF tool cost breakdown to understand where your money actually goes when you outsource versus print in-house.
| Equipment | Required | Optional |
|---|---|---|
| Heat press | Yes | |
| Pressing pillow | Yes | |
| Teflon sheet | Yes | |
| Lint roller | Yes | |
| Temp gun | Recommended | |
| DTF printer | Optional (in-house only) | |
| RIP software | Optional (in-house only) | |
| Powder shaker | Optional (in-house only) |
Understanding the types of DTF transfers available, such as standard, UV, or specialty films, helps you match the right product to each garment type.
Pro Tip: Choose a provider who offers a file pre-check service. Catching artwork issues before printing saves you from wasted transfers and delayed orders.
With tools and materials ready, it is time to design and order your DTF transfers.
Design and order preparation: Setting up for flawless transfers
Poor file setup is the number one cause of bad transfers. Getting this right before you submit artwork saves you reprints, delays, and money. Follow the DTF artwork setup guide to avoid the most common submission errors.
DTF artwork must be CMYK, 300 DPI, mirrored, with a transparent background. Use PNG or TIFF format. Never submit a JPEG with a white background.
Follow these steps before every order submission:
- Set color mode to CMYK in your design software before exporting
- Set resolution to 300 DPI at the final print size, not scaled up after the fact
- Mirror the artwork horizontally so it reads correctly after pressing
- Remove the background and export with transparency intact
- Use your provider’s template to confirm sizing and placement zones
- Double-check bleed and safe zones so no critical design elements get cut
- Save as PNG or TIFF for the cleanest file transfer
| Common mistake | Recommended approach |
|---|---|
| RGB color mode | Convert to CMYK before export |
| Low resolution (72 DPI) | Set to 300 DPI at final size |
| White background included | Export with transparent background |
| Artwork not mirrored | Mirror horizontally before saving |
| JPEG format | Use PNG or TIFF |
| Ignoring provider template | Always use the provided template |
Pro Tip: Always order a test print when launching a new graphic or pressing onto an unfamiliar fabric. A $5 test transfer can save you from ruining a $200 batch.
Once your ordered transfers arrive, you can move smoothly to the application step.
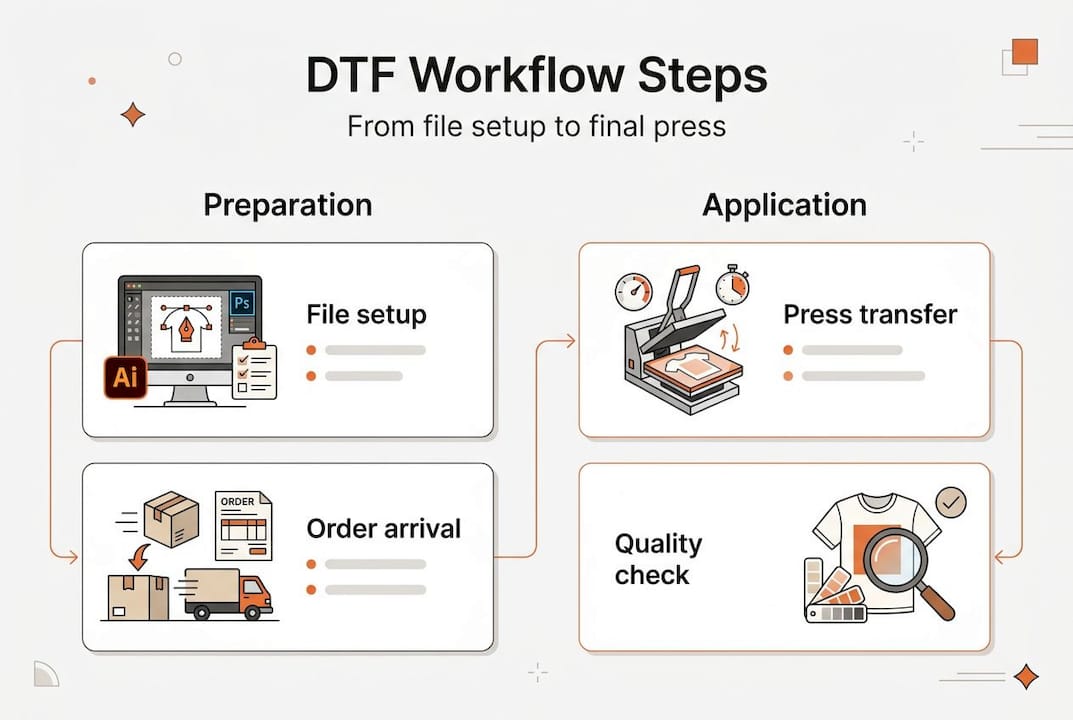
Applying DTF transfers: Step-by-step workflow
The application process is where your workflow either holds together or falls apart. Consistency here is everything. Application time per item is under 2 minutes, with press settings at 305 to 320°F for 12 to 20 seconds, and transfers last 50 or more washes when applied correctly.
Follow these steps for every garment:
- Pre-press the garment for 3 to 5 seconds to remove moisture and wrinkles
- Position the transfer film-side down on the garment, using a ruler or placement guide
- Cover with a Teflon sheet to protect the transfer and press surface
- Press at 305 to 320°F with medium-to-firm pressure for 12 to 20 seconds
- Peel the film while warm for a hot peel transfer, or let it cool fully for cold peel
- Post-press the transfer for 5 seconds with a Teflon sheet for extra adhesion and a matte finish
For perfect transfer results, always confirm whether your transfer is hot peel or cold peel before you start. Peeling at the wrong temperature is the most common cause of adhesion failure.
Watch for these common issues and their fixes:
- Ghosting or blurring: Garment or transfer shifted during pressing. Use a heat-resistant tape to hold placement.
- Poor adhesion at edges: Pressure is uneven. Use a pressing pillow under the garment.
- Transfer lifting after wash: Under-pressed. Add 2 to 3 seconds and post-press after peeling.
- Cracking after one wash: Over-pressed or pressed on a coated fabric. Lower temp by 10°F and test again.
Safety note: DTF transfers and garments reach temperatures above 300°F during pressing. Always use heat-resistant gloves when handling freshly pressed items. Work in a ventilated space to avoid inhaling any fumes from the pressing process.
Review the full streamlined DTF steps for a deeper breakdown of each stage.
After applying your transfers, it is important to evaluate their durability and overall quality.
Quality control and troubleshooting for repeat success
A great-looking transfer right off the press means nothing if it falls apart after three washes. Quality control is not optional. It is the step that protects your reputation and your refund rate.
DTF transfers are durable for 50 or more washes when correctly applied. That durability only holds if your press settings, peel method, and garment prep are consistent every single time.
Signs of a quality transfer:
- Smooth, even surface with no bubbling or lifting at edges
- Vibrant color that matches your original artwork
- Flexible feel that moves with the fabric
- No cracking or peeling after a test wash on inside-out, cold water cycle
Warning signs to watch for:
- Dull or faded color compared to the original file
- Edges lifting or curling after cooling
- Stiff or plasticky feel on the garment
- Any cracking visible before the first wash
Pro Tip: Log every batch with press temp, dwell time, peel method, and garment type. When something goes wrong, your log tells you exactly what changed. This is the fastest way to fix problems and prevent them from repeating.
If you spot consistent issues, check the DIY troubleshooting tips and review your ensuring quality DTF process before contacting your provider. When you do reach out, send photos of the issue alongside your batch log. That combination gets you a faster resolution.
By following these steps, you are set up for high-quality, repeatable DTF results. Now let us look at how to scale this process.
Scaling and optimizing your DTF workflow
Once your workflow is consistent, the next question is how to grow it without breaking what is working. Scaling is not just about ordering more transfers. It is about making smarter decisions at every volume level.
Outsourcing works best when you are building demand and targeting 15 to 25% margins. In-house production starts making financial sense at 500 or more transfers per month. Below that threshold, outsourcing almost always wins on cost and flexibility.
Signs you are ready to scale your outsourced workflow:
- You are consistently selling out of stock within days of restocking
- Your order volume is predictable enough to batch by week or month
- You have a reliable pressing rhythm and quality control system in place
- You are leaving money on the table because turnaround is too slow
When you are ready to grow, growing with transfer printing gives you a clear picture of what that transition looks like at different volume levels.
Practical optimization tips:
- Use auto gang sheets to fit more designs per sheet and lower your cost per transfer
- Batch similar orders together to reduce press setup time between runs
- Standardize your blank garment suppliers so pressing settings stay consistent
- Set a weekly order day with your provider to qualify for volume pricing
Pro Tip: Batch your orders into one or two weekly submissions instead of ordering daily. Most providers offer better pricing on larger sheets, and you will spend less time managing back-and-forth communication.
Next, see how you can put these proven methods to work with available solutions.
Take the next step: Fast-track your custom apparel workflow
You now have a complete picture of how a professional DTF workflow runs, from file setup to quality control to scaling. The next move is putting it into practice without starting from scratch.
At DIY Printz, we handle the full transfer production process so you can focus on pressing, fulfilling, and growing. Our same day DTF transfers are built for businesses that need speed without sacrificing quality. Upload your artwork, build your gang sheet automatically, and get production-ready transfers fast. Whether you are testing a new design or fulfilling a bulk order, our custom apparel workflow tools are designed to fit your operation at any volume. Start with a small run, see the quality for yourself, and build from there.
Frequently asked questions
What is the minimum equipment needed for outsourced DTF transfers?
You only need a heat press, blank garments, and ready-to-press DTF transfers from your provider. A pressing pillow and Teflon sheet round out the minimal equipment needed for clean, consistent results.
How fast can I complete one DTF transfer application?
Each transfer takes under 2 minutes to apply when your press is dialed in and your garments are prepped. Pre-pressing and post-pressing add only a few seconds each.
What file specs do providers need for DTF transfers?
Submit artwork as 300 DPI, CMYK, mirrored, with a transparent background in PNG or TIFF format. Skipping any one of these steps is the most common cause of print quality issues.
How durable are outsourced DTF transfers on apparel?
Correctly applied DTF transfers last over 50 washes with consistent color and adhesion. Wash garments inside out in cold water to maximize transfer life.
At what order volume does in-house DTF make sense?
In-house production becomes cost effective when you are printing 500 or more transfers per month. Below that volume, outsourcing delivers better margins and far less overhead.