


Custom apparel creators often struggle to achieve vivid, long-lasting prints without investing in heavy industrial setups. For small business owners and DIY enthusiasts in places like Canada, India, and the United States, mastering the direct-to-film workflow offers a practical path to professional results. Whether you want sharper colors or more durable designs, this step-by-step guide outlines each critical technique and expert tip needed for reliable, high-quality DTF transfers no matter your scale.
Jump to a section
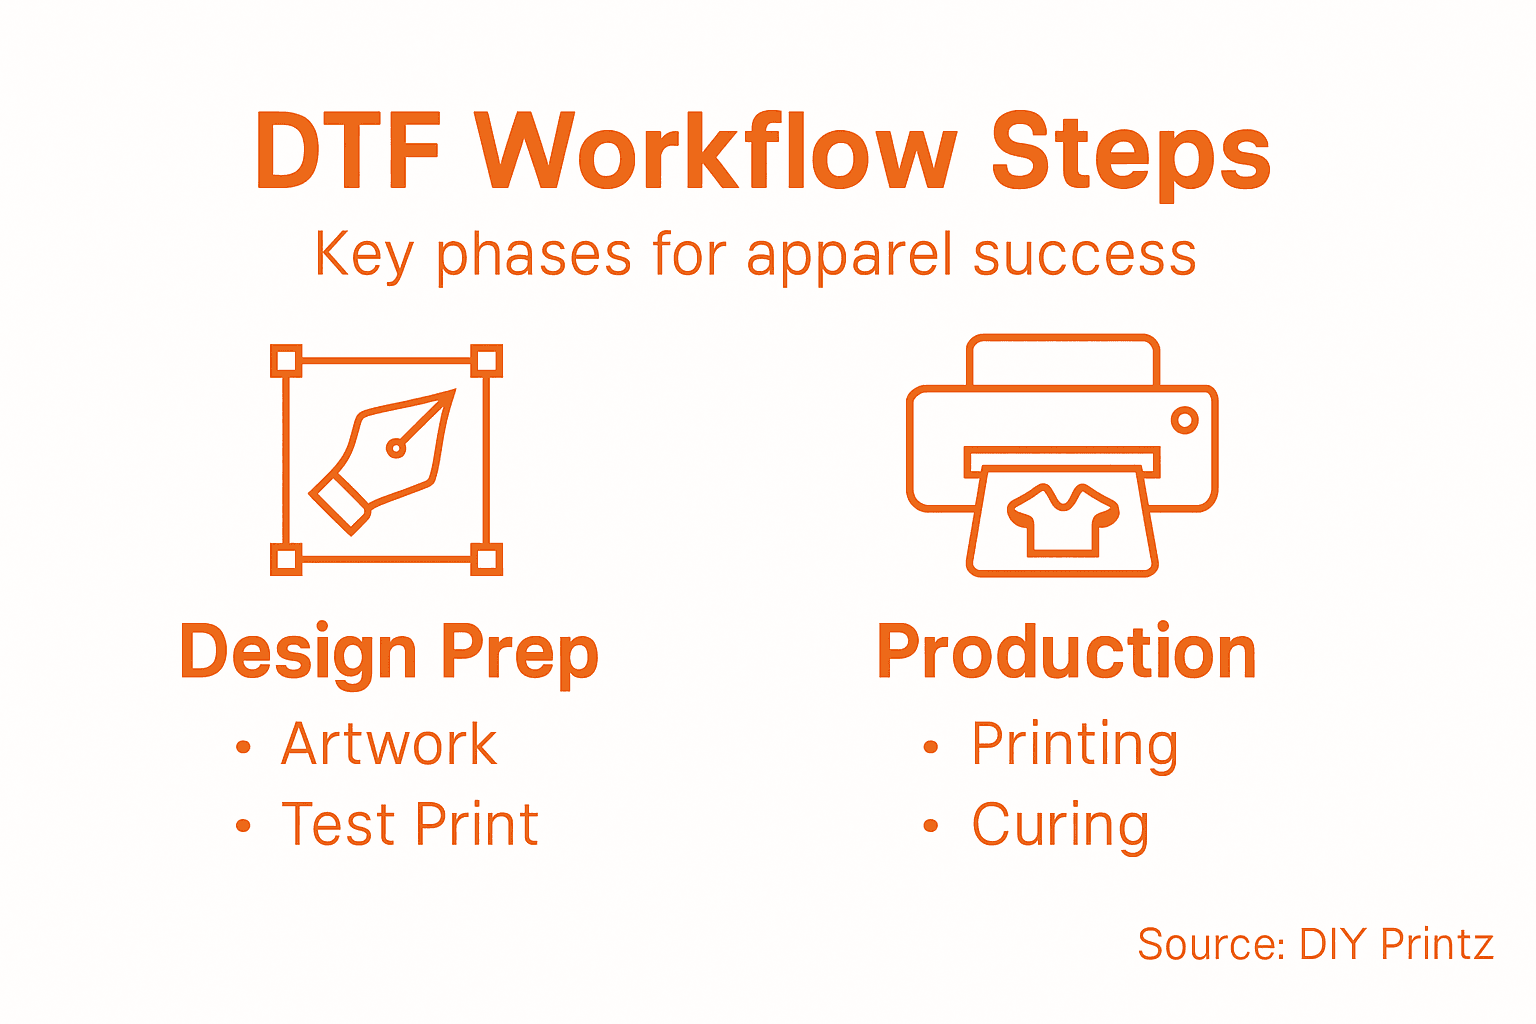
- Step 1: Prepare Artwork For Optimal Transfer Results
- Step 2: Set Up Dtf Printer And Select Correct Materials
- Step 3: Print And Cure Dtf Transfers Efficiently
- Step 4: Apply Transfers To Garments With Proper Heat Settings
- Step 5: Inspect And Finish Garments For Quality Assurance
- Achieve Flawless DTF Transfers with DIY Printz Solutions
- Frequently Asked Questions
- Recommended
Quick Summary
| Key Point | Explanation |
|---|---|
| 1. Prepare High-Quality Artwork | Ensure your digital design has a minimum resolution of 300 DPI for clear and professional transfers. |
| 2. Set Up Printer Correctly | Use reliable printer settings, including ink formulations and temperature, to ensure consistent quality. |
| 3. Master Heat Transfer Technique | Maintain precise temperature and pressure during the heat transfer for optimal adhesion and durability. |
| 4. Conduct Thorough Quality Checks | Inspect transfers for alignment, color consistency, and adhesion strength to ensure professional results. |
| 5. Document Settings for Reproducibility | Create logs for temperature, pressure, and material performance to replicate successful transfers consistently. |
Step 1: Prepare artwork for optimal transfer results
Creating exceptional DTF transfers starts with impeccable artwork preparation. The quality of your digital design directly impacts the final printed garment, making this initial phase critical for achieving professional results.
Successful artwork preparation requires understanding several key technical considerations. Start by ensuring your digital file meets critical resolution standards - minimum 300 DPI for crisp, clear transfers. Canva export settings can significantly influence your final print quality, so pay close attention to your file’s technical specifications.
When preparing your artwork, focus on these essential elements:
- Use high-resolution source images
- Choose color modes compatible with DTF printing (CMYK preferred)
- Eliminate background pixels for clean transfers
- Maintain original image aspect ratios
- Check graphic file compatibility (PNG, TIFF recommended)
Professional designers understand that image preparation is more than resolution. Consider factors like color depth, contrast, and detail preservation. Complex graphics might require strategic adjustments to translate perfectly onto fabric.
Here’s a quick reference of artwork factors and their impact on DTF transfer quality:
| Artwork Factor | Influence on Result | Potential Issues |
|---|---|---|
| Resolution | Sharpness and detail | Blurring if too low |
| Color Mode | Accurate color reproduction | Shifting if set wrong |
| Aspect Ratio | Correct proportions | Image stretching |
| File Format | Print compatibility | Color loss |
| Background Removal | Clean transfer edges | Print artifacts |
Optimal artwork preparation transforms good designs into extraordinary custom apparel transfers.
Pro tip: Always perform a test print on a sample transfer sheet to validate your artwork’s visual fidelity before committing to full production.
Step 2: Set up DTF printer and select correct materials
Setting up your DTF printer and selecting the right materials are foundational steps that determine the quality and efficiency of your custom apparel production. Understanding the nuanced requirements of direct-to-film printing will help you achieve professional results consistently.
Start by selecting a reliable DTF printer compatible with your production needs. Look for models offering precise ink distribution and consistent temperature control. When choosing materials, focus on three critical components: transfer film, printer ink, and powder adhesive. Heat press techniques can further enhance your transfer quality, so invest time in understanding your equipment’s specific requirements.
Prepare your printer setup with these essential considerations:
- Calibrate print head alignment
- Use manufacturer-recommended ink formulations
- Select high-quality PET transfer films
- Maintain consistent room temperature (68-75°F)
- Ensure proper ventilation in your workspace
Materials selection goes beyond basic compatibility. Each component plays a crucial role in transfer quality. White ink serves as a crucial base layer for dark garments, while CMYK inks handle color reproduction. Powder adhesive thickness directly influences transfer durability and wash resistance.
Precision in printer setup and material selection separates amateur prints from professional-grade transfers.
Pro tip: Invest in routine maintenance and keep detailed logs of your printer settings and material performance to consistently reproduce high-quality transfers.
Step 3: Print and cure DTF transfers efficiently
Successful DTF printing requires precision and careful attention to multiple technical parameters that directly impact transfer quality. Mastering the print and cure process transforms your custom apparel production from amateur to professional grade.
Begin by focusing on white ink management - the foundation of exceptional DTF transfers. DTF hybrid techniques emphasize the critical role of consistent white ink layering, which serves as the crucial base for vibrant color reproduction. Ensure your printer’s white ink settings provide uniform coverage without oversaturation.
Critical steps for efficient DTF transfer printing include:
- Calibrate print head for precise white ink application
- Maintain consistent powder application thickness
- Control curing temperature between 320-340°F
- Use digital temperature measurement tools
- Allow adequate cooling time between printing stages
The curing process demands meticulous temperature and timing control. Undercuring can lead to transfer failure, while overcuring might degrade image quality. Aim for a sweet spot that ensures optimal adhesion and color vibrancy. Professional printers typically use specialized heat press equipment with digital temperature controls to achieve consistent results.
Precision in printing and curing separates professional custom apparel producers from hobbyists.
Pro tip: Create a standardized process log to track temperature, timing, and material performance, enabling you to replicate successful transfers consistently.
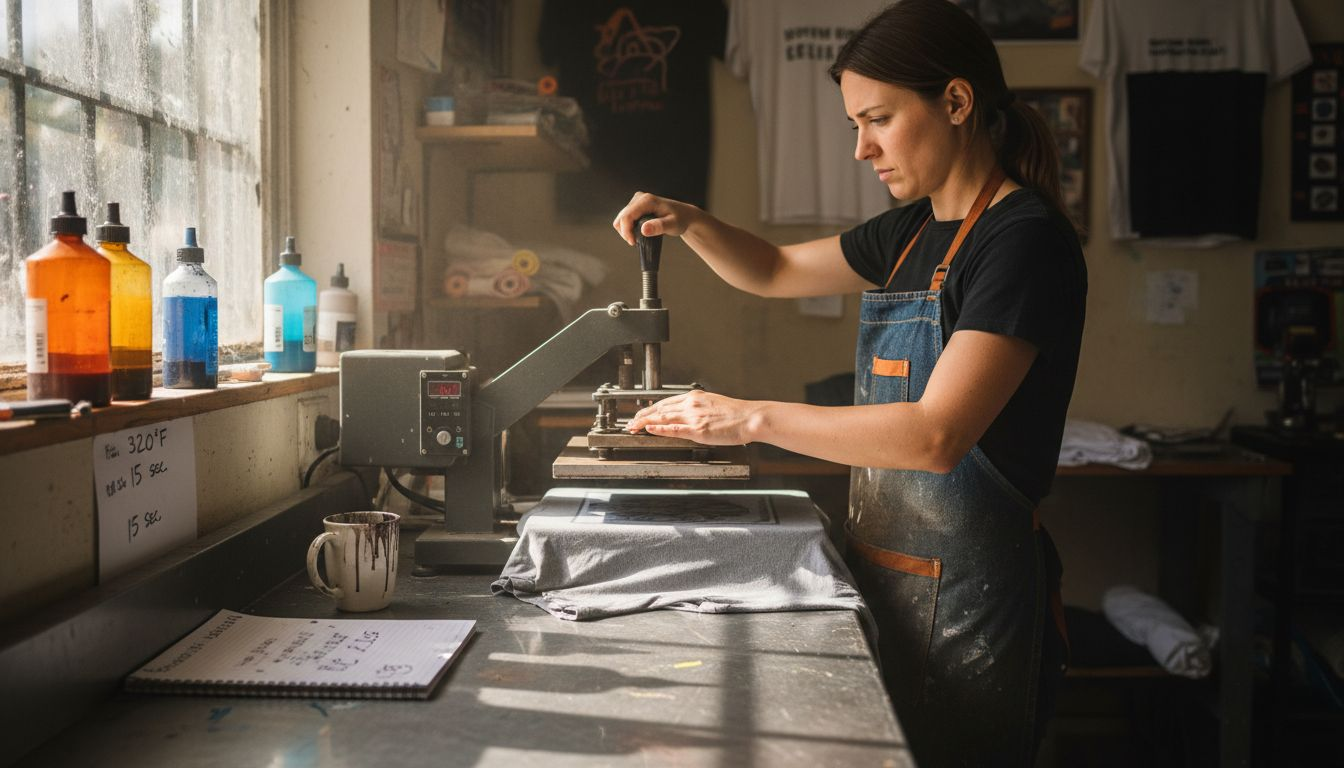
Step 4: Apply transfers to garments with proper heat settings
Successfully transferring designs onto garments requires precision and understanding of heat press techniques. Your ability to master these settings will determine the professional quality and durability of your custom apparel.
The heat transfer process demands careful attention to temperature, pressure, and timing. Same day DTF transfer techniques emphasize the importance of consistent heat application. Aim for a precise temperature range between 305-320°F, which provides optimal adhesion without damaging delicate fabrics.
Key considerations for successful heat transfer include:
- Preheat garment to remove moisture
- Use a silicone pressing mat for even pressure
- Apply medium to firm pressure during transfer
- Use a heat-resistant Teflon sheet to protect design
- Allow adequate cooling time after pressing
Compare heat press requirements for different fabric types:
| Fabric Type | Ideal Temp (°F) | Pressure Level | Recommended Duration |
|---|---|---|---|
| Cotton | 315-320 | Medium to firm | 12-15 seconds |
| Polyester | 305-310 | Medium | 8-12 seconds |
| Blends | 310-315 | Medium | 10-14 seconds |
Precision in heat transfer separates professional custom apparel from amateur attempts.
Pro tip: Create a reference chart documenting ideal heat settings for different fabric types, enabling quick and accurate transfers every time.
Step 5: Inspect and finish garments for quality assurance
Quality assurance represents the final critical checkpoint in your DTF transfer workflow. Your meticulous inspection determines whether a garment meets professional standards and customer expectations.
Clothing quality inspection techniques emphasize comprehensive review processes that go beyond surface-level examination. Systematic inspection involves checking multiple aspects of your transferred garment to ensure absolute professional quality.
Key quality assurance checkpoints include:
- Verify transfer alignment and positioning
- Check transfer edge smoothness
- Inspect for color consistency
- Test transfer adhesion strength
- Examine garment for potential defects
- Validate print clarity and sharpness
A thorough inspection requires careful visual and tactile assessment. White background transfers need particular attention to ensure even coverage and seamless integration with the fabric. Professional producers typically use natural light and magnification tools to detect subtle imperfections that might escape casual observation.
Exceptional quality control transforms good prints into outstanding custom apparel.
Pro tip: Create a standardized quality checklist with specific pass/fail criteria to maintain consistent evaluation standards across all your productions.
Achieve Flawless DTF Transfers with DIY Printz Solutions
Mastering the DTF transfer workflow means paying close attention to artwork preparation, printer setup, curing processes, and heat press techniques. If you find yourself struggling with precise white ink application, forced to guess the right temperature for different fabrics, or seeking consistent professional results without investing in industrial equipment your business can grow with the right support. Our platform understands these challenges and offers a wide selection of premium direct-to-film transfers, reliable supplies, and expert guidance tailored for small business owners and DIY enthusiasts.
Discover how DIY Printz simplifies every step from vibrant gang sheets to same-day printing services. Take control of your custom apparel production with fast turnaround, discounted membership benefits, and educational tools that ensure your designs come alive exactly as planned. Visit DIY Printz now to explore our transfer printing solutions and start turning your creative vision into professional-quality custom apparel today.
Frequently Asked Questions
How do I prepare artwork for DTF transfers?
To prepare artwork for DTF transfers, ensure your digital file has a minimum resolution of 300 DPI. Focus on using high-quality images, choosing CMYK color modes, and removing any background pixels to achieve clean transfers.
What printer settings should I use for DTF printing?
For optimal DTF printing, calibrate your printer’s print head for precise white ink application and maintain a curing temperature between 320-340°F. Regularly check settings and performance to ensure consistent print quality.
What heat settings should I apply when transferring designs onto garments?
When applying DTF transfers, set your heat press between 305-320°F, depending on the fabric type. Use medium to firm pressure for 10-15 seconds, and make sure to preheat the garment to remove moisture before transferring.
How can I ensure the quality of my Dtf transfers?
To ensure quality, conduct a thorough inspection of each garment after transfer, checking for alignment, adhesion strength, and color consistency. Create a checklist for specific quality criteria to maintain standards during production.
What are the critical components I need for DTF printing?
Essential components for DTF printing include a reliable printer, high-quality transfer film, suitable printer ink, and a powder adhesive. Selecting the right materials will significantly impact the durability and vibrancy of your final products.