


Running a custom apparel business or managing design projects as a hobbyist means juggling multiple steps, from concept to finished product. Without a clear workflow, you waste time troubleshooting errors, reprinting failed transfers, and dealing with inconsistent quality. An optimized Direct-to-Film transfer process changes everything. By following a systematic approach to design, printing, and application, you can reduce mistakes, speed up production, and deliver professional results every time. This guide walks you through each stage of an efficient DTF transfer workflow so you can focus on growing your brand instead of fighting your process.
Table of Contents
- Key takeaways
- Gathering materials and setting up your workspace
- Step-by-step custom apparel design and DTF transfer production
- Common pitfalls and troubleshooting in DTF transfer workflows
- Verifying finished products and ensuring consistent quality
- Grow your custom apparel business with DIYPRINTZ
- What software is best for designing artwork for DTF transfers?
- How do I maintain my heat press to avoid print errors?
- What common mistakes should I avoid during DTF transfer application?
Key Takeaways
| Point | Details |
|---|---|
| Preparation boosts efficiency | Proper workspace setup with the right tools and materials significantly impacts DTF transfer quality and speed. |
| Step by step process | Following an exact design to heat press workflow reduces errors and delivers consistent results. |
| High dpi and CMYK | Use at least 300 DPI and convert RGB to CMYK to prevent color shifts in DTF printing. |
| Verify and export | Confirm printer RIP settings and film type before printing and export the final design as a high quality PNG or TIFF preserving transparency. |
Gathering materials and setting up your workspace
Before you start designing or printing, you need the right tools and a workspace that supports efficiency. Proper setup of tools and materials significantly impacts DTF transfer quality and process speed. Begin by collecting your design software, whether that’s Adobe Illustrator, Photoshop, CorelDRAW, or free alternatives like GIMP and Inkscape. Your software should handle high-resolution files and color profiles specific to DTF printing.
Next, assess your printing equipment. If you own a DTF printer, ensure it’s calibrated and stocked with quality inks and transfer films. If you’re outsourcing to a service like DIYPRINTZ, you’ll skip the printer maintenance but still need a reliable heat press. Your heat press should offer precise temperature and pressure control, as inconsistent settings ruin transfers. Stock blank apparel in the fabrics and colors you plan to work with, and keep a supply of parchment paper or Teflon sheets for protecting garments during pressing.
Your workspace matters more than you might think. A clean, organized area with stable temperature and humidity prevents film warping and adhesive issues. Dedicate separate zones for design work, printing or transfer prep, and heat pressing. This separation reduces cross-contamination and speeds up your workflow. Keep your design station free of dust and liquids that could damage electronics or files. Position your heat press near an outlet with adequate ventilation, as the heat and fumes require airflow.
Pro Tip: Arrange your workspace so materials flow in one direction, from design to finished product. This linear layout cuts down on wasted motion and helps you spot bottlenecks faster.
Here’s a materials checklist to ensure you have everything before starting:
| Category | Items needed |
|---|---|
| Design software | Vector editor, raster editor, color management tools |
| Printing equipment | DTF printer (or outsourced service), quality inks, transfer films |
| Heat press | Adjustable temperature and pressure, timer, parchment or Teflon sheets |
| Blank apparel | Cotton, polyester, or blends in desired sizes and colors |
| Workspace essentials | Clean surfaces, stable climate, organized storage, good lighting |
Once your workspace is ready and materials are within reach, you’re set to move into the design and production phase with confidence. Skipping this preparation step leads to interruptions, errors, and frustration later.
Step-by-step custom apparel design and DTF transfer production
With your workspace prepared, it’s time to execute the design and printing process. Following exact steps from design to heat press ensures vibrant and durable custom prints that meet professional standards. Start by creating or importing your artwork into your design software. Set your canvas to the final print size, accounting for any bleed or safe zones. Use high-resolution images, at least 300 DPI, to avoid pixelation on the finished garment.
Adjust your color profile to match DTF printing requirements. Most DTF processes use CMYK color mode, so convert RGB files to prevent color shifts. If your design includes gradients or fine details, test print a small section first to confirm the output matches your expectations. Export your final design as a high-quality PNG or TIFF file, preserving transparency if your design has a knockout background.
If you’re printing in-house, follow these steps:
- Load the DTF transfer film into your printer, ensuring it’s aligned and tensioned correctly.
- Verify that your printer’s RIP software is configured for the correct film type and color profile.
- Print your design onto the film, allowing the printer to apply the CMYK inks and white underbase as needed.
- Immediately after printing, apply the adhesive powder evenly across the wet ink while it’s still tacky.
- Shake off excess powder and transfer the film to a curing oven or heat press to melt and set the adhesive.
- Allow the transfer to cool completely before handling, as premature handling can smudge or damage the print.
If you’re outsourcing to a service, submit your design files according to their specifications and wait for the finished transfers to arrive. Either way, the next step is applying the transfer to your apparel.
Set your heat press to the recommended temperature, typically between 300 and 320 degrees Fahrenheit, depending on the film and fabric. Preheat your garment for a few seconds to remove moisture and wrinkles. Position the transfer on the garment with the printed side down, aligning it carefully. Close the heat press and apply firm, even pressure for the recommended time, usually 10 to 15 seconds.
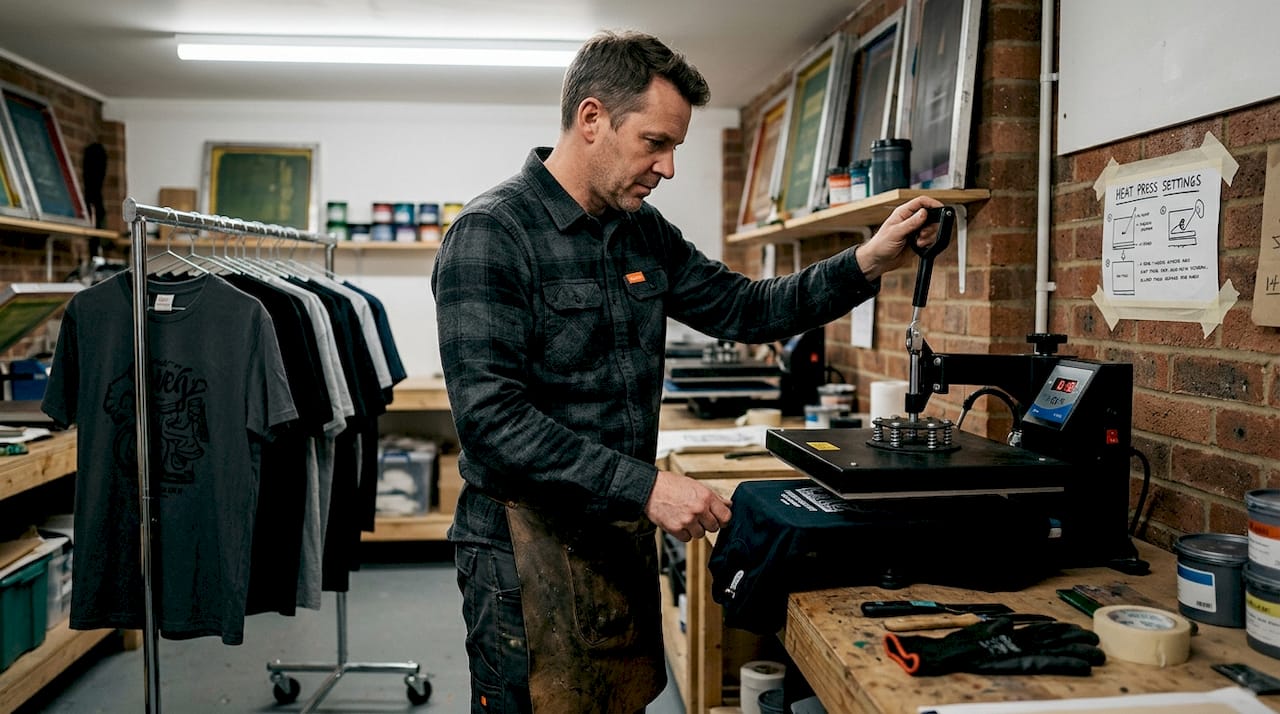
After pressing, peel the transfer film. Some films require a hot peel, meaning you remove the film immediately while the garment is still hot. Others need a cold peel, where you wait for the garment to cool before peeling. Check your film’s instructions to avoid ruining the print. Once peeled, press the garment again for a few seconds to set the adhesive fully.
Pro Tip: Always test your heat press settings on a scrap piece of fabric before pressing your final product. A few seconds of testing can save you from wasting a finished transfer and garment.
Common pitfalls and troubleshooting in DTF transfer workflows
Even with a solid process, issues can arise. Awareness and resolution of common workflow mistakes reduce waste and increase customer satisfaction. Knowing how to troubleshoot quickly keeps your production moving and protects your bottom line.
Print misalignment is one of the most frequent problems. This happens when the transfer shifts during pressing or when the design wasn’t centered on the film. To fix this, use alignment guides or templates on your heat press platen. Mark the center of your garment and transfer before pressing, and double-check positioning before closing the press. If misalignment is a recurring issue, consider upgrading to a heat press with a laser alignment system.
Poor adhesion shows up as peeling or cracking after washing. This usually stems from incorrect heat press temperature, insufficient pressure, or contaminated fabric. Ensure your heat press is calibrated and reaches the correct temperature before pressing. Apply firm, even pressure across the entire transfer. Pre-wash blank garments to remove sizing or fabric softeners that interfere with adhesion. If adhesion problems persist, test a different transfer film or adhesive powder.
Color fading or dullness can result from incorrect color profiles, low-quality inks, or improper curing. Verify that your design uses the correct CMYK profile for DTF printing. Invest in high-quality inks that are formulated for durability and vibrancy. Make sure your curing process fully melts the adhesive powder without overheating, which can degrade colors.
Always wear heat-resistant gloves when operating a heat press and keep flammable materials away from the pressing area. Burns and fire hazards are real risks in any heat transfer workflow.
Equipment maintenance prevents breakdowns and keeps quality consistent. Clean your heat press platen regularly to remove adhesive residue that can transfer to garments. Inspect heating elements and replace worn parts before they fail. For DTF printers, run cleaning cycles as recommended by the manufacturer and check print heads for clogs. Store transfer films in a cool, dry place to prevent warping or adhesive degradation.
Here are quick troubleshooting tips for common issues:
- Transfer won’t stick: Increase temperature or pressure, pre-wash fabric, verify film compatibility.
- Colors look washed out: Check color profile, replace old inks, ensure proper curing.
- Design edges are rough: Use higher resolution files, clean print heads, adjust printer settings.
- Film peels too early: Wait for garment to cool if using cold peel film, or peel immediately if using hot peel.
By staying alert to these pitfalls and addressing them quickly, you maintain a smooth workflow and avoid costly mistakes.
Verifying finished products and ensuring consistent quality
Once you’ve pressed your transfer and the garment has cooled, it’s time to inspect the finished product. Systematic product verification improves reliability and brand reputation for custom apparel businesses. Quality control isn’t just about catching defects; it’s about building trust with your customers and refining your process over time.
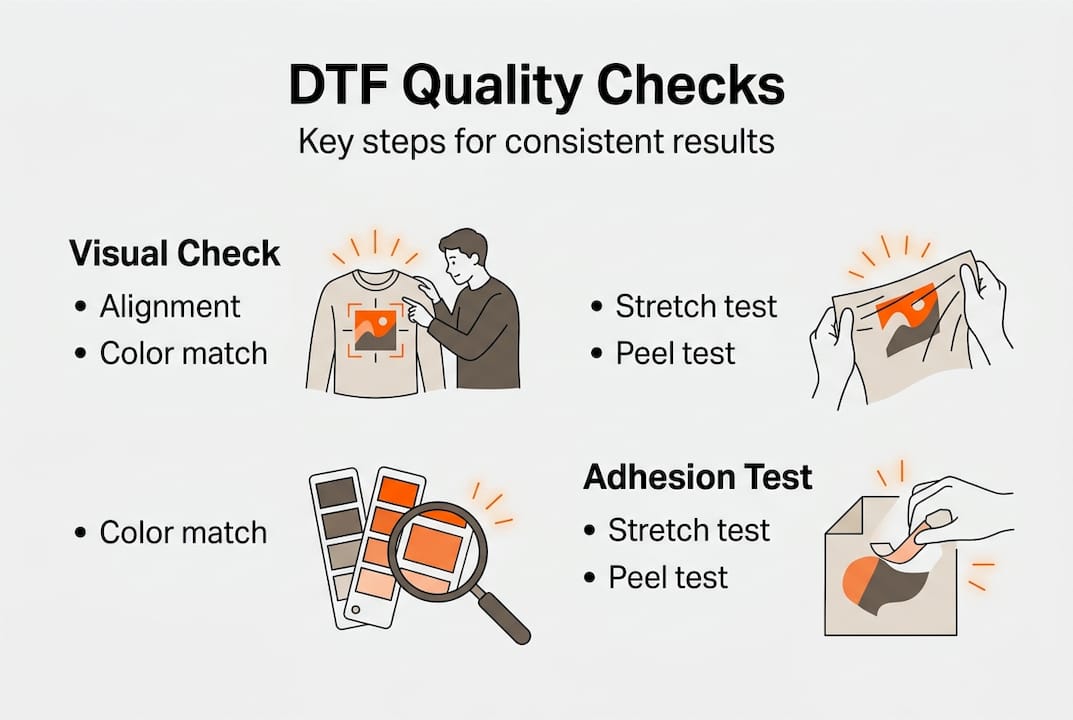
Start with a visual inspection. Check that the design is centered and aligned correctly on the garment. Look for any smudges, color inconsistencies, or areas where the transfer didn’t adhere fully. Hold the garment up to good lighting and examine fine details and gradients. If you spot any flaws, decide whether they’re acceptable for your standards or if the item needs to be reprinted.
Next, perform an adhesion test. Gently stretch the fabric around the printed area to see if the transfer flexes with the material or if it cracks. A properly applied DTF transfer should move with the fabric without peeling or breaking. If the transfer feels stiff or shows cracks, your heat press settings or film quality may need adjustment.
Color accuracy is another critical checkpoint. Compare the finished print to your original design file or a color-matched sample. If colors are off, revisit your color profile settings and ink quality. Keep a reference swatch or printed sample for each design to ensure consistency across batches.
Here’s a comparison table of pass versus fail criteria for final inspection:
| Quality checkpoint | Pass criteria | Fail criteria |
|---|---|---|
| Alignment | Design centered, no visible shifts | Off-center, crooked, or misaligned |
| Adhesion | Transfer flexes with fabric, no peeling | Cracks, peels, or lifts when stretched |
| Color accuracy | Matches design file or sample | Faded, shifted hues, or inconsistent tones |
| Print clarity | Sharp edges, clean details, no smudges | Blurry, pixelated, or smeared areas |
| Surface finish | Smooth, even texture | Rough, uneven, or sticky residue |
Establish a routine for quality control that fits your production volume. For small batches, inspect every item. For larger runs, inspect the first few pieces, then random samples throughout the batch. Document any defects and track patterns over time to identify recurring issues.
Best practices for consistent quality include:
- Calibrate your heat press weekly to maintain accurate temperature and pressure.
- Use the same transfer film and ink batches for each design to avoid variations.
- Train anyone involved in the workflow on proper techniques and quality standards.
- Keep detailed records of settings, materials, and outcomes for each job.
- Solicit customer feedback and use it to refine your process.
By verifying each finished product and maintaining strict quality standards, you protect your brand’s reputation and ensure customers receive apparel they’re proud to wear.
Grow your custom apparel business with DIYPRINTZ
Building an efficient workflow is just the start. To truly scale your custom apparel business, you need reliable partners and high-quality materials that support your growth. DIYPRINTZ specializes in ready-to-press DTF transfers that eliminate the hassle of in-house printing while delivering professional results. Whether you’re running a print shop, launching a merch brand, or exploring custom apparel as a hobby, DIYPRINTZ handles the transfer production so you can focus on design, sales, and fulfillment.
With hundreds to thousands of orders produced every month, DIYPRINTZ offers consistent quality and fast turnaround times that keep your projects on schedule. From small custom runs to bulk production, you get transfers that press cleanly, last through repeated washes, and look vibrant on any fabric. Explore the full range of custom apparel supplies, design resources, and transfer options to streamline your workflow and take your business to the next level.
What software is best for designing artwork for DTF transfers?
Adobe Illustrator and CorelDRAW are top choices for vector-based designs, offering precise control over shapes, text, and color profiles. For raster artwork and photo editing, Adobe Photoshop provides the high-resolution capabilities and CMYK color management essential for DTF printing. Free alternatives like Inkscape and GIMP work well for hobbyists and small businesses on a budget. Whichever software you choose, ensure it supports 300 DPI or higher resolution and allows you to export in formats like PNG or TIFF with transparency. Proper custom apparel printing starts with clean, high-quality design files.
How do I maintain my heat press to avoid print errors?
Regular cleaning of the platen and upper heating element prevents adhesive buildup that can transfer to garments and cause uneven pressure. Replace worn Teflon sheets or parchment paper frequently, as damaged surfaces can create hot spots or stick to transfers. Check the temperature accuracy of your heat press before each session using an infrared thermometer, as calibration drift leads to inconsistent results. Lubricate moving parts and inspect wiring for signs of wear to avoid breakdowns during production. Consistent maintenance supports fast turnaround printing and keeps your workflow running smoothly.
What common mistakes should I avoid during DTF transfer application?
Incorrect heat press time and temperature are the most frequent errors, leading to poor adhesion or scorched transfers. Always follow the film manufacturer’s recommended settings and test on scrap fabric first. Misalignment happens when you rush the setup, so take time to center and secure the transfer before pressing. Peeling the film at the wrong time, whether too early or too late, can ruin the print, so know whether your film requires a hot or cold peel. Skipping the pre-press step to remove moisture and wrinkles from the garment also causes adhesion problems. Avoiding these pitfalls ensures your custom apparel printing delivers professional results every time.