

Custom Apparel Printing Guide for Easy DTF Transfers
Follow this custom apparel printing guide for step-by-step DTF transfer printing. Achieve professional results and streamline your order fulfillment process.

Finding reliable ways to produce vibrant apparel can feel overwhelming when every order needs to look professional and last through repeated washes. For small business owners and DIY enthusiasts, the right DTF transfer setup helps remove production headaches and makes fulfillment less stressful. You will discover how to prep artwork and garment materials, pick transfers that fit your needs, and apply designs that truly stand out for your customers. Get ready to simplify your workflow with direct-to-film printing that works smoothly on cotton, polyester, and blends without extra fabric pre-treatment.
Table of Contents
- Step 1: Prepare Your Artwork and Garment Materials
- Step 2: Choose and Order the Right DTF Transfers
- Step 3: Press and Apply Transfers to Apparel
- Step 4: Inspect and Cure for Lasting Quality
Quick Summary
| Key Point | Explanation |
|---|---|
| 1. Prepare high-resolution artwork | Ensure your design file is at least 300 DPI and in RGB color mode for optimal DTF transfers. |
| 2. Use compatible garment materials | Choose cotton, polyester, or cotton-blends for best results; avoid heavy textures like velvet. |
| 3. Test transfers before bulk orders | Always validate a small batch for color and adhesion quality before committing to larger quantities. |
| 4. Follow precise heat press settings | Use the correct temperature and pressure according to fabric type to ensure proper adhesion. |
| 5. Cure and inspect for quality | Perform a second heat press cycle to secure durability and inspect for any defects immediately after peeling. |
Step 1: Prepare Your Artwork and Garment Materials
Getting your artwork and garments ready sets the foundation for successful DTF transfers. This step determines whether your final product looks professional or falls short of expectations. Let’s walk through what you need to do.
Prepare your digital artwork first. Your design file needs to be print-ready and properly formatted. Start by creating or finalizing your artwork in a design program like Adobe Photoshop, Illustrator, or even free tools like Canva. Make sure your file is high resolution—at least 300 DPI for crisp, clear transfers. Your design should be in RGB color mode (not CMYK) since direct-to-film printing uses specialized inks that work best with RGB files.
Here’s what your artwork checklist should include:
- Resolution at 300 DPI minimum for sharp detail
- RGB color mode for optimal ink compatibility
- Correct file format (PNG with transparent background or PDF)
- Design scaled to final transfer size
- No text smaller than 6 points
Next, mirror your design. DTF transfers require your artwork to be flipped horizontally before printing. This is crucial because the design prints onto film face-down, then transfers face-up onto your garment. If you forget this step, text and directional elements will come out backward. Most DTF service providers handle this automatically, but always confirm with your vendor.
Select compatible garment materials. Not all fabrics work equally well with DTF transfers. Cotton, cotton-poly blends, and polyester are your best options because DTF transfers don’t require fabric pre-treatment and the adhesive powder bonds reliably to these materials. Avoid heavily textured or fuzzy fabrics like velvet or chenille—the uneven surface prevents proper ink-to-fabric contact.
Garment material considerations:
Here’s a quick reference comparing DTF transfer compatibility with common garment materials:
| Fabric Type | Print Quality | Durability | Ideal Use Cases |
|---|---|---|---|
| Cotton | Vibrant and crisp | Long-lasting | T-shirts, casual wear |
| Polyester | Smooth and bold | Highly durable | Sportswear, uniforms |
| Cotton-Poly Blend | Consistent color | Balanced longevity | Everyday apparel, promo tees |
| Velvet/Chenille | Inconsistent print | Poor adhesion | Not recommended |
- Cotton: Excellent ink adhesion and color vibrancy
- Polyester: Great for performance wear and durability
- Cotton-poly blends: Balanced performance for most applications
- Dark fabrics: Use white ink underbase for color accuracy
- Light fabrics: Skip the white layer for better breathability
Inspect your garments before printing. Check for loose threads, seams, or wrinkles that could interfere with heat pressing. Pre-wash new items if they contain sizing or finishes that might reduce adhesion. Ensure garments are clean and dry—moisture and debris prevent proper transfer bonding.
Make sure your artwork and garments are ready before ordering transfers. Last-minute corrections or fabric changes add delays and cost.
Pro tip: Save your artwork files in multiple formats (PNG, PDF, PSD) and maintain a naming system with version numbers—this prevents confusion when ordering and makes reorders faster and more accurate.
Step 2: Choose and Order the Right DTF Transfers
Ordering quality DTF transfers is where your preparation pays off. You need to match your specific garments and designs with transfers built to last. Let’s make sure you select the right ones.
Understand what makes quality DTF transfers. Not all transfers are created equal. High-quality DTF transfers use optimized powder adhesives that bond durably with your garment material. The film itself matters too—it needs to be compatible with both your design and fabric type. Look for vendors who use specialized heat transfer films designed specifically for DTF printing, not generic alternatives.
Key factors for quality transfers include:
- Specialized heat transfer film compatible with DTF inks
- CMYK and white ink layers applied correctly
- Properly cured adhesive powder for strong bonding
- Testing on your specific fabric type before bulk orders
- Vendor experience with high-volume production
Match transfers to your garment specifics. Your transfer choice depends entirely on what you’re printing. Dark garments need a white ink underbase so colors pop and stay vibrant. Light fabrics work fine without white ink. Cotton, polyester, and blends all behave differently, so confirm your fabric composition when ordering. Mention sleeve placement, full-front designs, or back neck labels—these details affect how transfers are cut and produced.
Place your order with precision. Provide your vendor with exact specifications. Include garment color, fabric type, design dimensions, and placement location. DTF transfers can be stored after production, which means you can order in advance without rush fees. Submit high-resolution files (300 DPI minimum) and confirm that your vendor will mirror your design before printing.
When ordering, specify:
- Exact garment color and fabric content
- Design dimensions and placement (chest, back, sleeve)
- Quantity needed (test small batches first if new)
- File format and resolution confirmation
- Expected delivery timeline
Verify before committing to volume. Order a small test batch first. This lets you check color accuracy, adhesion, durability, and overall quality before printing hundreds of units. Wash a test transfer to see how it holds up. This small investment prevents costly mistakes on large orders.
Order test transfers first to verify quality and adhesion before committing to bulk production.
Pro tip: Build relationships with vendors who track your specifications—this saves time on repeat orders and ensures consistency across your product line.
Step 3: Press and Apply Transfers to Apparel
This is where your design comes to life. The heat press bonds your transfer to the garment permanently. Getting this step right determines whether your finished product looks professional and lasts through countless washes.
Set up your heat press correctly. Before you even open your transfer, prepare your equipment. Clean the heat press platen to remove any dust or residue that could mar your design. Check that your press heats evenly and maintains consistent temperature. Most heat presses have hot and cold spots, so test yours on scrap fabric first. You’ll need specific temperature and pressure settings based on your garment material and transfer type—these details come from your transfer vendor.
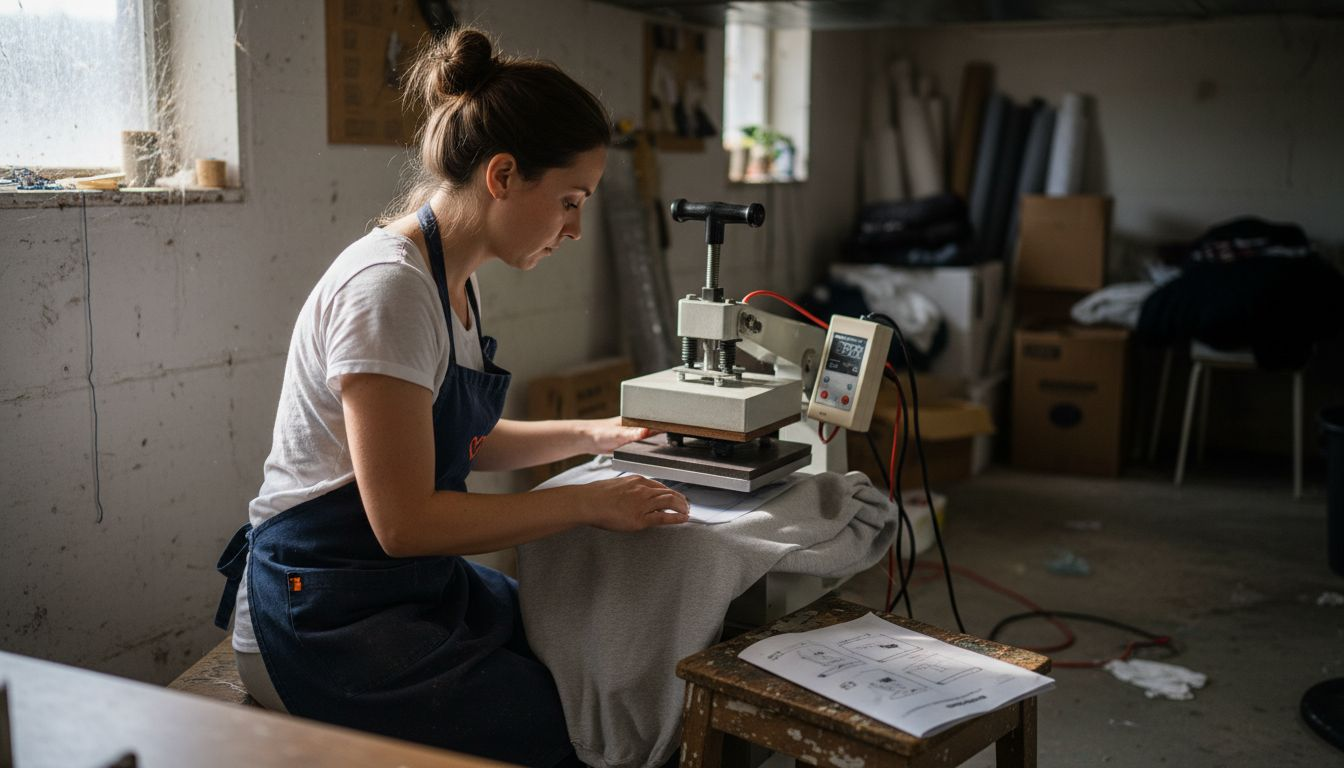
Position your garment and transfer properly. Lay your garment flat on the lower platen with no wrinkles or folds. Smooth it out completely. Place your DTF transfer face-down on the garment where you want it to appear. Make sure the transfer sits flat with no air bubbles underneath. This positioning matters because any gap prevents proper heat and pressure contact.
Before pressing, verify:
- Garment is wrinkle-free and properly positioned
- Transfer is face-down and completely flat
- All edges align with your intended placement
- Heat press temperature matches fabric requirements
- Pressure setting is appropriate for garment weight
Apply heat and pressure with precision. Close the heat press and hold it down for the recommended time. The adhesive powder activates through applying heat and pressure which bonds the design to your fabric fibers. Don’t rush this step or reduce time to save seconds—consistency matters. Most transfers require 10 to 15 seconds at 300 to 330 degrees Fahrenheit, but verify your specific settings with your transfer vendor.
Peel the carrier film immediately. Once the timer sounds, open the press carefully. While the transfer is still warm, peel the clear carrier film away from the garment at a 45-degree angle. Do this slowly and steadily. If the design lifts with the film, your press settings were too cool or your time was too short. If the film tears, your settings might be too hot. Adjust accordingly for your next garment.
Press with consistent temperature and time to ensure the adhesive powder bonds completely with the fabric.
Pro tip: Create a simple test log with your press settings, fabric type, and timing notes—this saves troubleshooting time and ensures repeatable results across your production.
Step 4: Inspect and Cure for Lasting Quality
Your transfer is applied, but the work isn’t finished. Inspecting and curing your garment ensures the design stays vibrant and durable through repeated washing and wear. This final step separates amateur results from professional quality.
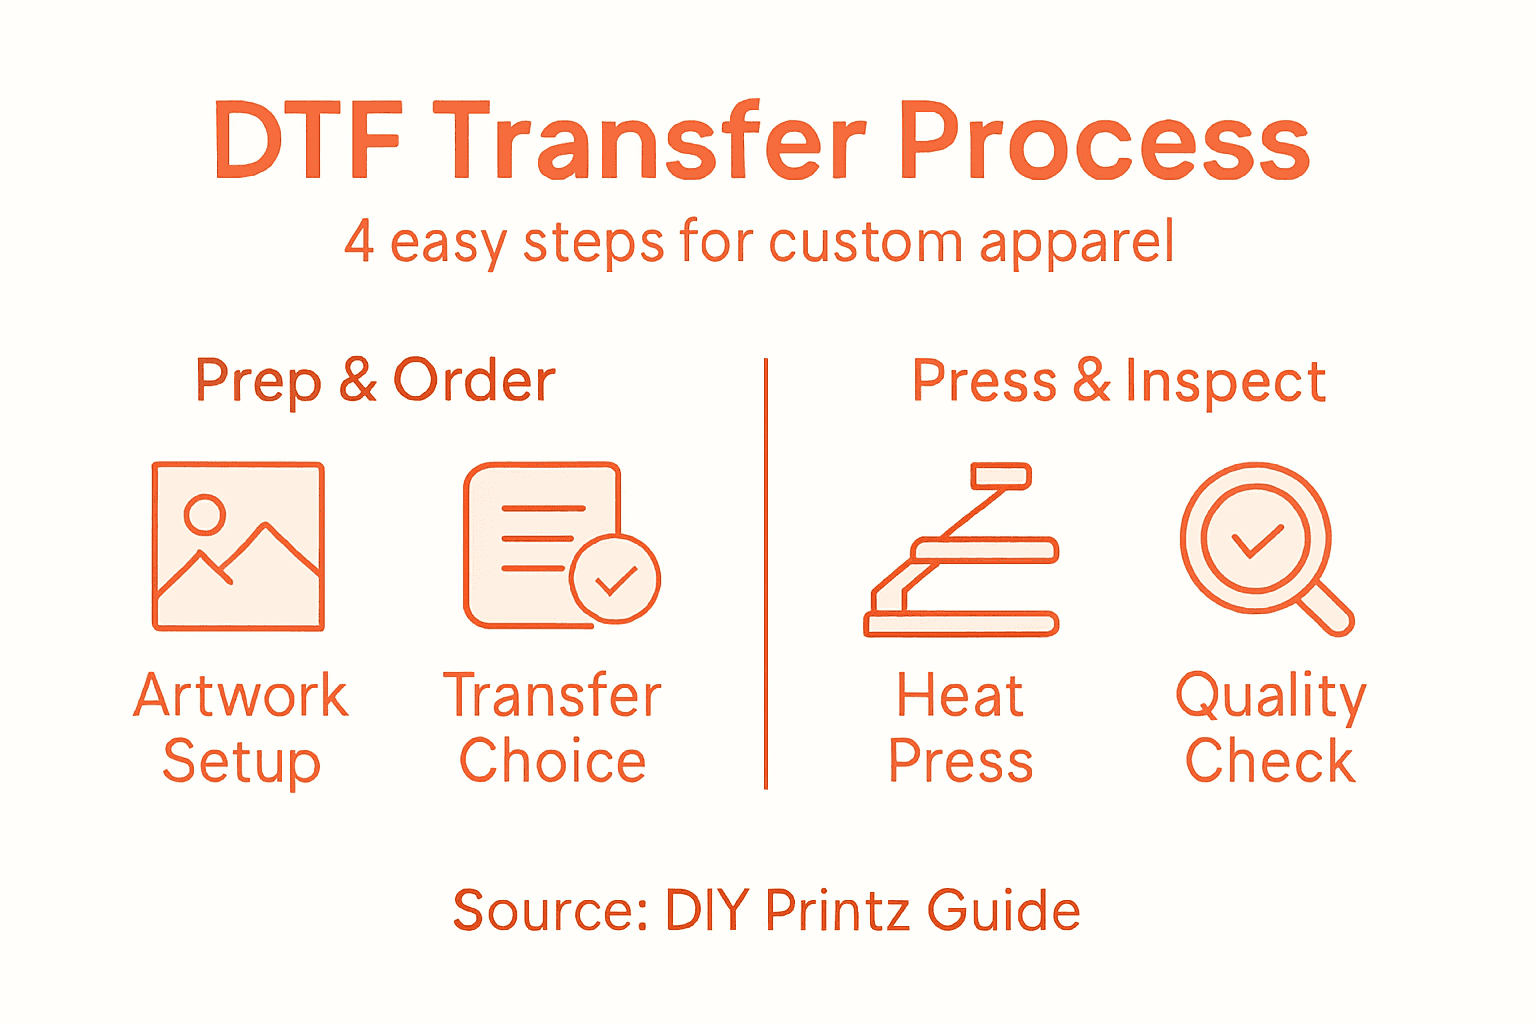
Inspect immediately after peeling. Once the carrier film comes off, examine the transfer carefully. Look for complete color coverage and proper adhesion across the entire design. Run your finger lightly across the transferred design—it should feel smooth and bonded, not loose or peeling at the edges. Check for any color inconsistencies, fading, or spots where ink didn’t transfer completely. Inspecting the garment for transfer defects ensures print quality before moving forward.
Inspection checklist:
- Design is fully adhered with no lifting edges
- Colors are vibrant and consistent throughout
- No white spots or incomplete coverage areas
- Transfer feels smooth and secure to the touch
- No visible wrinkles or bubbles under the design
Cure your garment for durability. Curing sets the inks and adhesive powder completely, making them resistant to fading and peeling. Most small-scale producers use a second heat press cycle at slightly lower temperature (around 250 to 280 degrees Fahrenheit) for 10 to 15 seconds. If you have access to a conveyor dryer, that’s even better for consistent results. A curing process ensures lasting quality and resistance to washing and wear, which is critical for customer satisfaction.
Allow garments to cool before handling. After curing, let your finished garments rest on a clean surface for a few minutes. This cooling period allows the adhesive to fully harden and set permanently. Don’t fold, stack, or package them while still warm. This brief wait prevents smudging and ensures maximum durability.
Curing best practices:
Below is a summary of DTF transfer application and curing settings for different garment types:
| Garment Material | Press Temp (°F) | Press Time (sec) | Cure Temp (°F) | Cure Time (sec) |
|---|---|---|---|---|
| Cotton | 320-330 | 12-15 | 260-270 | 10-15 |
| Polyester | 300-310 | 10-12 | 250-260 | 10-12 |
| Cotton-Poly Blend | 310-320 | 12-14 | 255-265 | 10-13 |
| Dark Colors | 330 (with underbase) | 15 | 280 | 15 |
| Light Colors | 320 (no underbase) | 12 | 260 | 10 |
- Apply consistent heat during the curing cycle
- Use proper temperature for your specific fabric type
- Allow adequate cooling time before packaging
- Test wash one sample per batch to verify durability
- Document your curing settings for future batches
Proper curing transforms a good transfer into one that lasts through countless washes without peeling or fading.
Pro tip: Wash test one sample garment at the temperature your customers will use—this reveals any adhesion issues before the entire batch ships out and builds confidence in your quality.
Simplify Your Custom Apparel Printing with Trusted DTF Transfer Solutions
Creating professional and durable DTF transfers involves careful artwork preparation, selecting the right garment materials, and mastering heat press techniques as outlined in the guide. If you find the detailed steps for mirroring artwork, selecting adhesives, and perfecting your press settings overwhelming or time-consuming, you are not alone. Many creators and businesses struggle with controlling print quality, avoiding costly mistakes, and managing production logistics.
DIY Printz removes these hurdles by handling the entire DTF transfer printing process for you. Our reliable, high-volume service delivers ready-to-press transfers that guarantee consistent color vibrancy and long-lasting adhesion across cotton, polyester, and blends. We help you skip the technical hassle so you can focus on pressing, selling, and growing your brand confidently.
Looking to streamline your custom apparel printing with premium DTF transfers without investing in expensive equipment or facing a steep learning curve
Discover the convenience and quality of our trusted DTF transfer printing service designed for businesses and creators like you. Get started now at DIY Printz and experience fast turnaround and expert craftsmanship that sets your apparel apart. Don’t let complex printing setups hold you back when professional results are just a click away.
Frequently Asked Questions
How do I prepare my artwork for DTF transfers?
To prepare your artwork for DTF transfers, ensure your design file is high resolution (at least 300 DPI) and in RGB color mode. Use software like Adobe Photoshop or Canva to finalize your design, save it in a compatible format (such as PNG or PDF), and adjust the design to scale with your intended transfer size.
What types of fabric are best for DTF printing?
The best fabrics for DTF printing include cotton, cotton-poly blends, and polyester, as they offer excellent adhesion and durability. Avoid using heavily textured fabrics like velvet or chenille, which can interfere with the transfer process.
What should I do before pressing the DTF transfer onto my garment?
Before pressing the DTF transfer, inspect your garment for wrinkles, loose threads, or dirt. Ensure the garment is clean and smooth, as a flat surface will help achieve a strong bond between the transfer and fabric.
How can I ensure the quality of my DTF transfers before placing a bulk order?
To ensure quality, order a small test batch of DTF transfers before making a bulk purchase. This allows you to evaluate the color accuracy, adhesion, and overall quality of the transfer on your specific fabric, preventing costly mistakes on larger orders.
What are the recommended heat press settings for applying DTF transfers?
For applying DTF transfers, recommended settings typically range between 300 to 330 degrees Fahrenheit for 10 to 15 seconds, depending on your garment material. Always verify the specific temperature and time with your transfer vendor to achieve optimal results.
How can I extend the durability of my DTF printed garments?
To extend the durability of your DTF printed garments, ensure you fully cure the transfers by applying a second heat press cycle at a lower temperature (around 250 to 280 degrees Fahrenheit) for 10 to 15 seconds. Allow the garments to cool completely before handling to secure the adhesive and design fully.
Recommended
- DTF Transfer Application Guide for Perfect Results – DIYPRINTZ
- Why Use DTF Transfers for Apparel Success – DIYPRINTZ
- 7 Practical Examples of DIY Apparel Printing for Brands – DIYPRINTZ
- DTF Transfer Workflow Guide for Custom Apparel Success – DIYPRINTZ
- Trodat 6/4911 Textile Replacement Ink Pad – Stamp Design 4U
READY TO PRINT?
Send us your artwork and we'll dial in your DTF transfer, color, and same-day turnaround.


