


A lot of creators assume that any digital image will work for apparel printing. Upload it, press print, done. But that assumption leads to blurry edges, washed-out colors, and transfers that peel after the first wash. Getting your artwork right before you send it to a DTF (Direct-to-Film) printer is not optional. It is the difference between a product you are proud to sell and one you have to reprint at your own cost. This guide walks you through every requirement you need to know, from file formats to final checklists, so your prints come out sharp every single time.
Table of Contents
- Why artwork requirements matter for apparel printing
- Essential artwork specifications for DTF apparel printing
- Artwork requirements: DTF vs. other apparel print methods
- Step-by-step workflow: Preparing your DTF artwork
- Final quality checklist and troubleshooting for DTF print artwork
- Get professional results with DIY Printz DTF solutions
- Frequently asked questions
Key Takeaways
| Point | Details |
|---|---|
| High-quality artwork is critical | Proper file specs and preparation lead to professional, durable DTF prints. |
| DTF specs differ from other methods | DTF allows more colors and detail but requires strict file prep to avoid issues. |
| Step-by-step workflow prevents errors | Following a pre-print checklist saves materials and time by catching mistakes early. |
| Expert tips boost results | Outlining fonts and adding bleed can dramatically improve final print quality. |
Why artwork requirements matter for apparel printing
Your artwork file is the foundation of every print. If that foundation has cracks, the final product will too. Vibrant, durable garment prints start with properly prepared files, and skipping this step costs you more than just time.
“Neglecting artwork standards can increase misprints and returns, cutting into your margins and slowing down your production cycle.”
Here is what happens when artwork requirements are ignored:
- Color loss: Incorrect color profiles cause prints to look dull or off-brand on the finished garment.
- Jagged edges: Low-resolution files produce pixelated outlines that look unprofessional up close.
- Longer production cycles: Files that need correction delay your order and push back your fulfillment timeline.
- Wasted materials: Every misprint uses ink, film, and powder that you cannot recover.
The numbers back this up. Up to 35% of misprints are linked to poor artwork preparation. That is a significant chunk of waste that proper file setup can eliminate entirely. Beyond the cost savings, clean artwork protects your brand reputation. Customers notice when a print looks off, and they remember it.
Now that you know what is at stake, let us break down the specifics every apparel creator should follow.
Essential artwork specifications for DTF apparel printing
Getting your file specs right is the single most impactful thing you can do before sending artwork to print. Resolution, color profile, and file type are the three pillars of a print-ready DTF file.
Here is a quick reference table for the core specs:
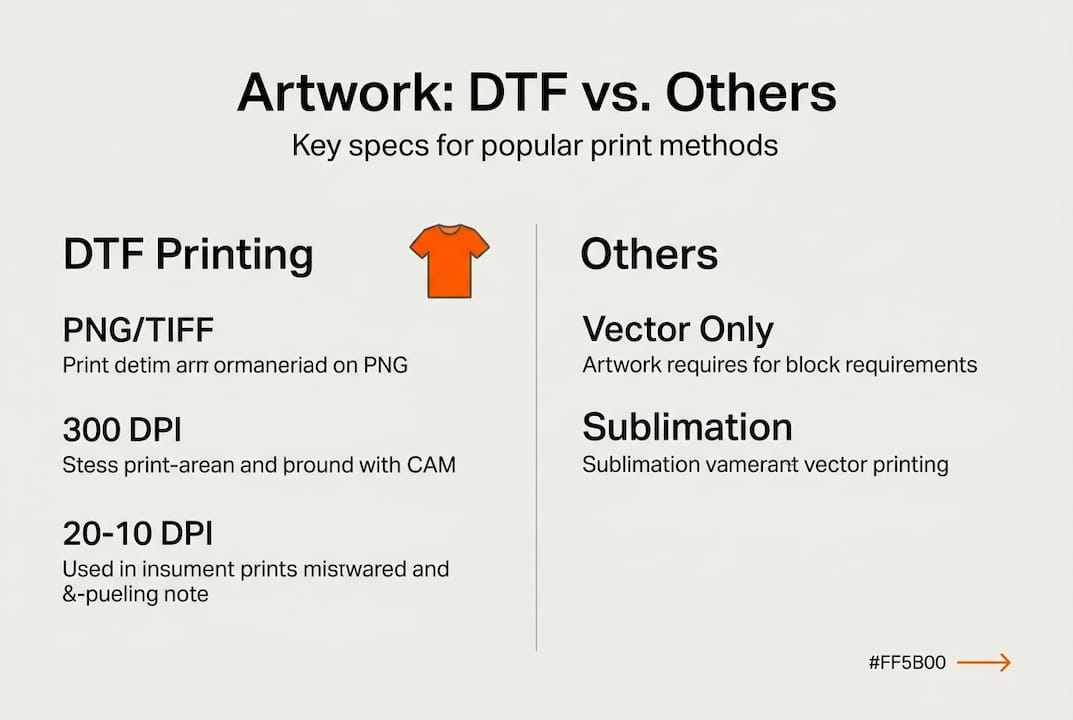
| Specification | Recommended Setting | Why It Matters |
|---|---|---|
| File format | PNG (transparent) or TIFF | Preserves detail and clean edges |
| Resolution | Minimum 300 DPI | Prevents blur at actual print size |
| Color mode | RGB | Matches DTF printer output accurately |
| Font handling | Outlined or embedded | Prevents font substitution errors |
| Background | Transparent | Avoids unwanted white boxes on garment |
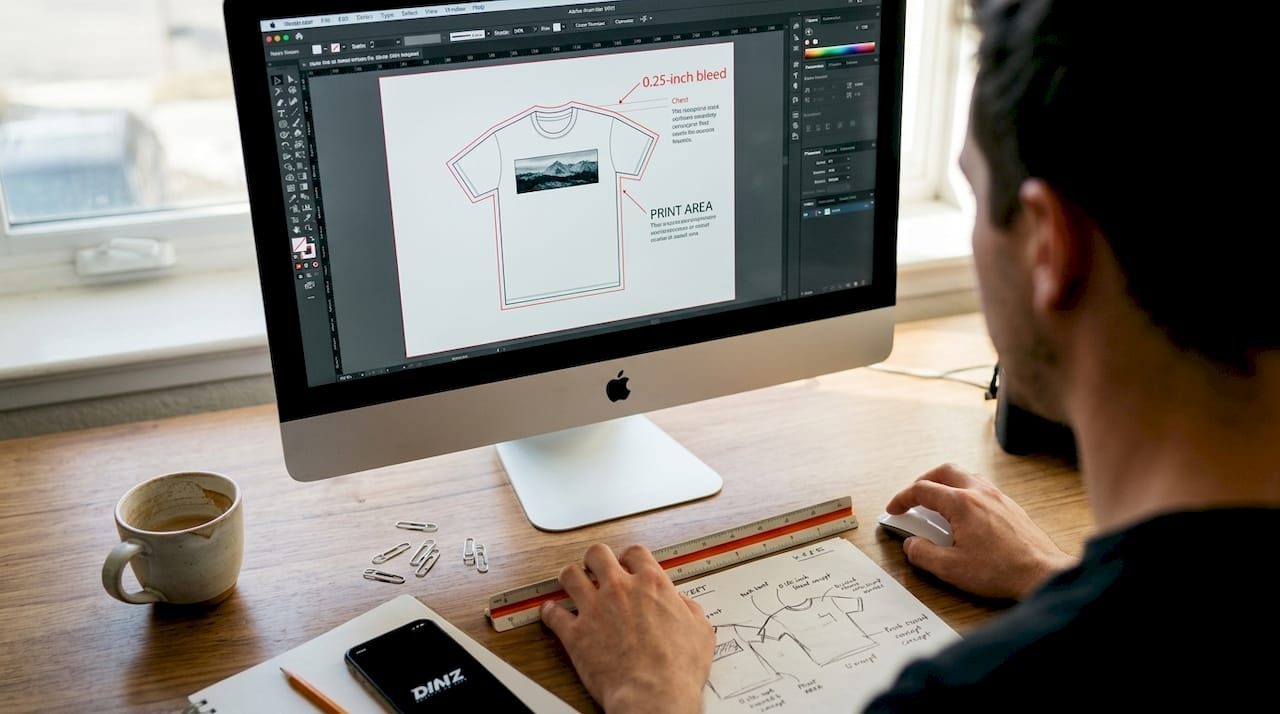
| Bleed | 0.25 inch around design | Ensures edge-to-edge coverage |
Follow these steps when setting up your file:
- Set your canvas to actual print size. If your design prints at 12 inches wide, your file should be 12 inches wide at 300 DPI, not scaled up later.
- Work in RGB color mode. DTF printers use RGB output. CMYK files can shift colors unexpectedly unless your provider specifically requests it.
- Use PNG with a transparent background. This is the most widely accepted format for DTF transfers and keeps your edges clean.
- Outline all fonts. Convert text to outlines or curves so the printer does not need your font installed to reproduce it correctly.
- Avoid tiny text and ultra-fine details. Anything under 6pt font or thinner than 1pt stroke may not transfer cleanly.
- Check your DTF transfer workflow before exporting to confirm your file matches your provider’s upload requirements.
Pro Tip: Add a 0.25-inch bleed around your design before exporting. This small buffer ensures the print covers the full intended area without leaving unprinted gaps at the edges.
With the core specs outlined, let us see how DTF compares to other print methods and why it has become a top choice for apparel creators.
Artwork requirements: DTF vs. other apparel print methods
Not all print methods are created equal, and neither are their artwork requirements. Understanding the differences helps you choose the right method for each job and prepare your files accordingly.
| Feature | DTF | Screen printing | Sublimation |
|---|---|---|---|
| File format | PNG, TIFF (RGB) | Vector (AI, EPS) | PNG, TIFF (RGB) |
| Color complexity | Unlimited, gradients OK | Limited by screen count | Unlimited, but polyester only |
| Garment compatibility | Cotton, blends, dark fabrics | Most fabrics | Polyester or coated items only |
| Small run suitability | Excellent | Poor (high setup cost) | Good |
| Photo-quality prints | Yes | No | Yes |
| Transparency support | Yes | No | No |
DTF accepts complex designs with vivid color gradients, while screen printing and sublimation carry more limitations on design complexity and fabric type.
Here is what sets each method apart in practice:
- DTF works on virtually any fabric, including cotton and dark garments, with no color limitations. It is ideal for small runs and detailed, multi-color artwork.
- Screen printing requires each color to be a separate layer in a vector file. It is cost-effective at high volumes but expensive for complex, multi-color designs in small quantities.
- Sublimation produces stunning results but only on polyester or polymer-coated surfaces. It also cannot print on dark fabrics because the dye is transparent.
For most small business owners and merch creators working with varied garment types and detailed graphics, DTF is the most flexible and accessible option. Check out the full breakdown of garment transfer types to match the right method to your specific product line.
After clarifying which method best fits your needs, let us walk through a practical workflow for preparing your artwork.
Step-by-step workflow: Preparing your DTF artwork
A consistent workflow saves you from last-minute scrambles and costly reprints. Follow this sequence every time you prepare a file for DTF printing.
- Organize your layers. Keep design elements on separate layers so you can make quick edits without affecting the whole file.
- Check resolution at actual print size. Zoom to 100% in your design software. If it looks sharp there, it will print sharp.
- Switch to RGB color mode. Confirm your document color settings before you do anything else.
- Outline all fonts. Select every text element and convert to outlines or paths. This is non-negotiable.
- Remove or delete the background. Make sure your canvas background is transparent, not white. A white background will print as a white box on your garment.
- Add your bleed. Expand your canvas by 0.25 inches on each side if your design runs to the edge.
- Flatten and export. Merge visible layers and export as a PNG with transparency at 300 DPI minimum.
- Name your file clearly. Use a descriptive file name that includes the design name, size, and color count. This helps your print provider process your order faster.
Using a pre-production checklist reduces errors and streamlines DTF processing, especially when you are managing multiple designs at once.
“The biggest mistake creators make is sending a file they built for web use. Screen resolution is 72 DPI. Print resolution is 300 DPI minimum. These are not interchangeable.”
Pro Tip: Use mockup tools to visualize your design on an actual garment before sending it to print. Mockups reveal sizing issues, placement problems, and color concerns that are easy to miss on a blank canvas. You can also use them to streamline your DTF workflow by catching problems before they reach production.
You are almost ready to print. Let us look at a final quality checklist and what to do if adjustments are needed.
Final quality checklist and troubleshooting for DTF print artwork
Before you upload your file, run through this checklist. It takes two minutes and can save you from a full reprint.
- File format: Is it PNG with transparency or a high-resolution TIFF?
- Resolution: Is it 300 DPI or higher at actual print size?
- Color mode: Is it set to RGB?
- Fonts: Are all text elements outlined or embedded?
- Background: Is the background fully transparent with no hidden white layers?
- Bleed: Have you added 0.25 inches of bleed if the design runs to the edge?
- Size: Does the design fit within the intended print area for the garment?
- Legibility: Does small text remain readable when viewed at actual print scale?
- File name: Is the file named clearly with relevant details for your print provider?
A last artwork check prevents unnecessary errors and wasted materials, especially on bulk orders where a single file issue can affect hundreds of units.
If something looks off after your review, do not guess. Contact your print provider before reworking the file from scratch. Most experienced DTF printers can identify the issue quickly and tell you exactly what needs to change. Reworking blindly wastes time and often introduces new problems. Use the T-shirt printing tips from providers who work with small businesses daily to stay ahead of common issues.
Get professional results with DIY Printz DTF solutions
You have done the work to prepare your artwork correctly. Now you need a print partner who can match that effort with fast, consistent output.
At DIY Printz, we process hundreds to thousands of DTF transfer orders every month, and we know exactly what a print-ready file looks like. When your artwork meets the specs outlined in this guide, you can upload it directly for same day DTF transfers and get your order moving without delays. If you are working with multiple designs or need to maximize your film usage, our auto gang sheet builder automatically arranges your designs to reduce waste and cut your per-unit cost. Whether you are running a small merch drop or fulfilling bulk orders, we make the transfer production side simple so you can focus on pressing, selling, and growing.
Frequently asked questions
What file format is best for DTF apparel printing?
PNG with transparency or high-resolution TIFF is preferred for DTF apparel printing because it preserves detail and clean edges without compression artifacts.
How do I avoid blurry prints on apparel?
Use a minimum of 300 DPI resolution and always set your artwork to actual print size before exporting, not scaled up from a smaller file.
Can I use designs with gradients and photos for DTF transfers?
Yes. DTF accepts complex designs and vivid gradients far better than screen printing, making it the go-to method for photorealistic and multi-color artwork.
Do I need to outline fonts in my artwork files?
Outlining fonts ensures your text prints correctly even if your print provider does not have your specific font installed on their system.
How can I verify my artwork is truly ready to print?
Run through a pre-print checklist covering file format, resolution, bleed, color mode, and transparency before uploading your file to your print provider.