


TL;DR:
- Following a detailed checklist minimizes errors and speeds up custom apparel production.
- Proper artwork formatting and material choice are critical for quality and durability.
- Post-press inspection and supplier communication prevent costly mistakes before final shipment.
Missing one step in your custom apparel process can mean reprints, delayed shipments, and unhappy customers. For small business owners managing merch drops, uniforms, or branded gear, those mistakes add up fast. A clear, detailed checklist keeps your DTF transfer orders on track from the first design concept to the final heat-press. This article walks you through every critical stage, so you can submit orders with confidence, avoid costly errors, and keep your production running smoothly. Whether you’re new to custom apparel or scaling up your output, this guide gives you the practical framework you need.
Table of Contents
- Identifying your custom apparel goals and audience
- Design essentials: Artwork, sizing, and print preparation
- Choosing the right materials and garments for DTF printing
- The production and ordering process: Step-by-step checklist
- Our take: What most custom apparel checklists miss
- Streamline your apparel production with fast, reliable DTF transfers
- Frequently asked questions
Key Takeaways
| Point | Details |
|---|---|
| Clarify your goals | Define your business objectives and product audience before starting your custom apparel project. |
| Perfect your design files | Use the correct file formats and prep your designs for optimal DTF print results. |
| Choose the right materials | Select compatible garments and inspect them for quality before print runs. |
| Follow an order checklist | Execute each production step methodically to avoid delays and mistakes. |
| Audit and improve each batch | Review finished goods and processes for continuous quality improvement. |
Identifying your custom apparel goals and audience
Before you upload a single file or order a single blank, you need to know exactly what you’re trying to accomplish. Custom apparel serves a wide range of purposes, and each one demands a different approach.
Start by defining your primary goal. Are you creating branded merchandise to sell online? Producing employee uniforms for a local business? Launching a limited-edition drop for your social media following? Each goal shapes your decisions around style, quantity, and budget. Getting this wrong early means reworking everything later.
Next, think about who is actually wearing the product. Understanding your target audience increases design impact, which means your apparel connects better and sells more effectively. Consider age range, style preferences, and how the garment will be used. A streetwear brand targets a very different customer than a company ordering polos for a trade show.
Once you know your audience, translate those insights into concrete apparel specifications:
- Quantity: Small test run or bulk production order?
- Garment style: T-shirts, hoodies, hats, tote bags?
- Fit and sizing: Unisex, fitted, youth, or plus sizes?
- Color palette: Does your design work on dark, light, or both?
- Budget range: What is your cost per unit target?
These decisions directly affect which garment blanks you choose and how you structure your DTF transfer order. Reviewing custom apparel fundamentals before you start can save you from making assumptions that cost money later.
If you’re unsure about design direction, look at custom print examples from similar brands for inspiration and clarity.
Pro Tip: Before locking in a design, create a simple mood board and send a short survey to a handful of your target customers. Even five responses can reveal preferences you didn’t expect and prevent a costly redesign.
Design essentials: Artwork, sizing, and print preparation
Once you know your audience and business objectives, focus on perfecting your artwork and design files. This is where most first-time DTF buyers run into trouble. Submitting the wrong file type or a low-resolution image leads to blurry prints, processing delays, and wasted money.
Here’s a step-by-step design preparation checklist:
- Use the right file format. PNG files with a transparent background are the standard for DTF transfers. Vector files (AI or PDF) also work well for logos and text-heavy designs.
- Set your resolution to at least 300 DPI. Anything lower will print with visible pixelation, especially on larger designs.
- Check your color mode. DTF printers typically output in CMYK, so convert your file from RGB if needed to avoid unexpected color shifts.
- Define your print dimensions. Know the exact size you want printed before submitting. A chest print on a small tee is typically 10 to 12 inches wide.
- Proof your artwork on a mockup. Place your design on a digital mockup of the garment before approving. This catches placement issues and proportion problems early.
- Remove unnecessary layers and hidden elements. Clean up your file so only the intended design is visible and printable.
Properly formatted artwork files speed up order processing and reduce errors, which means faster turnaround for you. Taking 15 minutes to audit your file before uploading can save hours of back-and-forth with your print supplier.
For more ideas on how to structure your visuals, browse apparel design inspiration from real brand examples.
Pro Tip: Build your designs at a large base size and scale down as needed. This keeps your artwork sharp across multiple garment sizes without requiring separate files for each one.
Choosing the right materials and garments for DTF printing
After design preparation, choosing the right apparel blank makes or breaks your print quality and customer satisfaction. DTF transfers bond to a wide range of fabrics, but not all materials perform equally.
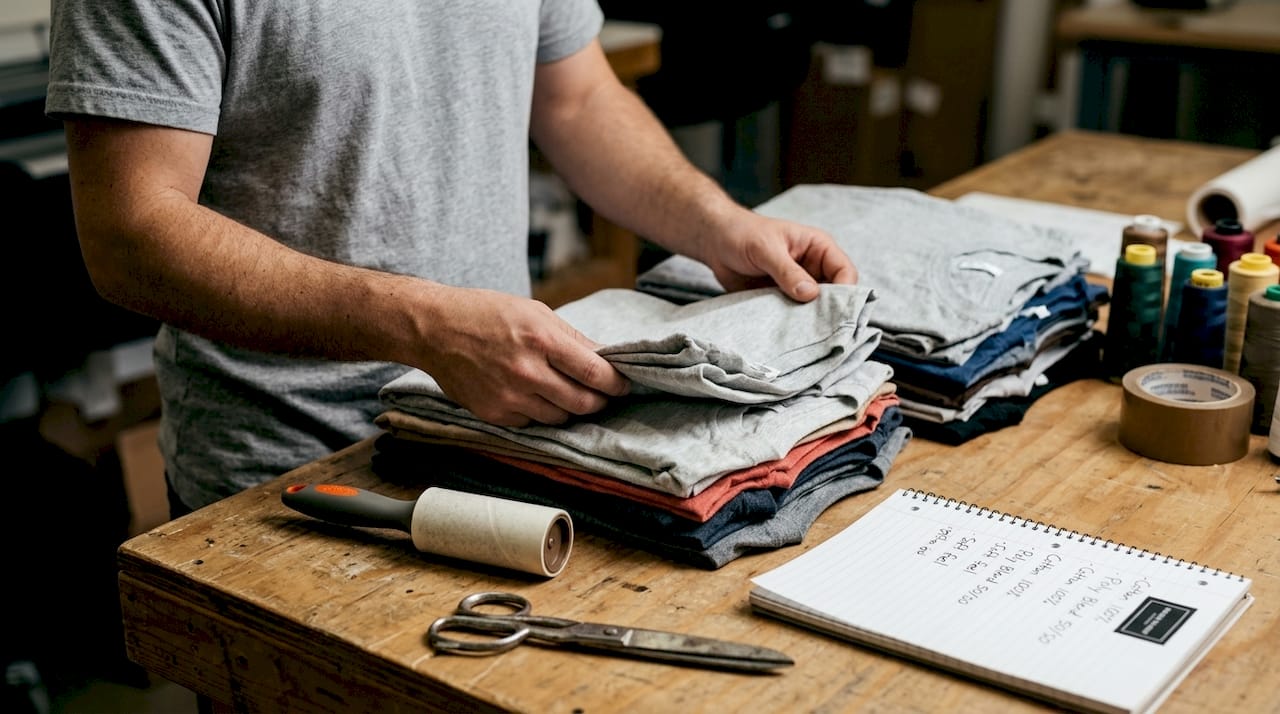
Material choice impacts both appearance and print durability, so picking the wrong blank can lead to peeling, cracking, or dull colors after just a few washes.
Here is a quick comparison of common garment types and their DTF compatibility:
| Garment type | DTF compatibility | Best for | Notes |
|---|---|---|---|
| 100% cotton t-shirt | Excellent | Everyday merch, uniforms | Soft feel, vibrant color output |
| 100% polyester | Good | Sportswear, activewear | May need lower press temp |
| Cotton-poly blend | Excellent | Versatile use cases | Most popular for DTF |
| Hoodie (fleece) | Good | Seasonal drops, streetwear | Check fabric weight |
| Structured hat | Moderate | Branded accessories | Flat brim areas work best |
Before you send garments to be pressed, run through this inspection checklist:
- Check fabric weight (measured in GSM). Heavier fabrics hold up better over time.
- Inspect seams for consistency. Irregular seams affect print placement.
- Confirm colorfastness. Pre-washed blanks reduce shrinkage and color bleeding.
- Verify there are no surface treatments or coatings that could block adhesion.
Also consider care instructions by material type. Cotton can handle higher wash temperatures, while polyester needs cold or warm water only. Passing this information along to your customers reduces returns and complaints. Reviewing garment printing benefits and screen printing examples can help you understand how different fabrics perform across print methods.
The production and ordering process: Step-by-step checklist
With your materials and designs ready, it’s crucial to execute your production and ordering process efficiently. Skipping steps here is where most delays and reprints happen.
Following a stepwise process ensures deadlines and quality checkpoints are met, which keeps your customers happy and your margins intact.
Here is the full production ordering checklist:
- Submit your artwork for review. Upload your finalized file and confirm all specs with your DTF supplier.
- Build or review your gang sheet. A gang sheet groups multiple designs onto one transfer sheet to maximize efficiency and reduce cost.
- Approve your proof. Never skip this step. Review colors, sizing, and placement before authorizing production.
- Confirm all order details. Double-check quantities, garment sizes, colorways, and your delivery deadline.
- Complete payment. Confirm pricing includes any rush fees, shipping, or setup costs.
- Track your shipment. Get a tracking number and monitor delivery so you can plan your press schedule.
Here is a general timeline to plan around:
| Production step | Typical timeframe |
|---|---|
| Artwork review and approval | 1 to 4 hours |
| Standard DTF transfer production | 1 to 3 business days |
| Same-day DTF production | Same business day |
| Shipping (standard) | 2 to 5 business days |
| Shipping (expedited) | 1 to 2 business days |
For tips on cutting turnaround time without sacrificing quality, check out fast turnaround tips and the full breakdown at custom garment printing steps.
Pro Tip: Set a calendar reminder 24 hours after submitting your order to follow up with your supplier. Catching a miscommunication early prevents a multi-day delay down the line.
Our take: What most custom apparel checklists miss
Most checklists stop at order submission. That’s the problem. The real quality control happens after your transfers arrive and before your product ships to a customer.
We’ve seen businesses run a perfect order only to press transfers onto garments without a single inspection. A misprinted transfer, a fabric defect, or a placement error that gets caught after 50 shirts are pressed is far more expensive than one caught after five. Build a post-press inspection step into every batch. Check color accuracy, adhesion, and placement on at least 10% of your units before packaging.
Proactive communication also saves money. If something looks off, contact your supplier immediately rather than waiting until the full run is complete. Most issues are fixable early. They become expensive when they’re discovered at the end.
One habit we recommend is keeping a simple print test log. Record the garment type, press temperature, press time, and transfer batch number for every run. This log helps you replicate successful results and quickly diagnose problems when something goes wrong. It takes five minutes per session and pays off every time.
For more DIY garment printing insights, especially if you’re managing production in-house, that resource is worth bookmarking.
Streamline your apparel production with fast, reliable DTF transfers
You now have a complete checklist covering goals, design prep, material selection, and the full ordering process. Putting it into practice is the next step, and having the right supplier makes all the difference.
At DIY Printz, we handle the transfer production so you can focus on pressing, fulfilling, and growing. Our same day DTF transfers are built for businesses that need speed without sacrificing quality. The auto gang sheet builder makes it easy to organize multiple designs into a single efficient order, cutting waste and cost. Whether you’re running a small batch or a large production run, DIY Printz is ready to support your workflow from upload to delivery.
Frequently asked questions
What format should my artwork be for DTF transfers?
Your artwork should be in PNG format with a transparent background or as a vector file for the sharpest results. Properly formatted files speed up processing and reduce the chance of errors during production.
Which garments are best for DTF printing?
DTF prints adhere well to cotton, polyester, and cotton-blend garments, with cotton-poly blends being the most popular choice. Always check material compatibility with your supplier before placing a large order.
How do I avoid errors in my custom apparel order?
Use a detailed checklist, proof your designs on a mockup, and confirm all specifications before approving production. A stepwise process ensures quality checkpoints are met at every stage.
How quickly can I get custom apparel made with DTF transfers?
Turnaround times vary by provider, but DIY Printz offers same-day processing for qualifying orders submitted before the daily cut-off time. Expedited shipping options can get your transfers to you in one to two business days after production.
Recommended
- Top 5 Custom Apparel Examples: 70% Screen Printing 2026 – DIYPRINTZ
- Custom apparel design tips to boost quality in 2026 – DIYPRINTZ
- Innovative examples of custom garment prints for 2026 – DIYPRINTZ
- 7 Inspiring Examples of Custom Apparel Designs for Brands – DIYPRINTZ
- Top 8 Custom Letters Design Alternatives 2026