


Many small apparel business owners assume that producing high-quality garment prints requires expensive DTF printers and specialized equipment. This misconception keeps countless entrepreneurs from exploring cost-effective alternatives that deliver professional results without the hefty investment. DIY garment printing methods offer a practical solution, cutting costs by up to 75% while maintaining quality standards that satisfy customers. This guide reveals how accessible tools and smart techniques empower small businesses and hobbyists to create custom apparel without the financial burden and technical complexity of owning dedicated printing equipment.
Table of Contents
- Understanding DIY Garment Printing And Its Cost Benefits
- How The Freezer Paper Method Enables Precise, High-Quality Prints
- Comparing DIY Printing With Popular Alternatives: HTV, DTF, And Sublimation
- Practical Tips To Maximize Quality And Durability In DIY Garment Printing
- Explore Hassle-Free DTF Transfer Options At DIYPRINTZ
- FAQ
Key takeaways
| Point | Details |
|---|---|
| Cost savings | DIY printing methods reduce expenses by up to 75% compared to purchasing DTF printers and consumables |
| Freezer paper technique | This method enables precise custom prints on various fabrics without equipment jams or feeding issues |
| Fabric selection matters | Light-colored, tightly woven cotton provides optimal ink adherence and print clarity for beginners |
| Heat-setting ensures durability | Proper heat-setting with pigment-based inks creates permanent, washable prints that resist fading |
| Equipment flexibility | DIY approaches eliminate the need for specialized printer investments while maintaining professional quality |
Understanding DIY garment printing and its cost benefits
Small apparel businesses face a critical decision when entering the custom printing market: invest thousands in specialized equipment or explore budget-friendly alternatives. DIY fabric printing using inkjet printers and freezer paper offers a cost-effective alternative to DTF printing for small apparel businesses and hobbyists. This approach transforms standard home printers into fabric printing tools without requiring expensive modifications or dedicated workspace.
The financial advantages become clear when comparing startup costs. A basic DTF printer setup demands $3,000 to $8,000 for the printer alone, plus ongoing expenses for specialized inks, films, powder adhesives, and maintenance supplies. These consumables add hundreds of dollars monthly to operating costs. In contrast, DIY fabric printing requires only a standard inkjet printer you likely already own, freezer paper costing $5 to $10 per roll, and pigment-based inks around $30 for a set that lasts months.
Per-print economics favor DIY methods dramatically for small batch production. Material costs for a single DIY printed shirt range from $0.50 to $1.50, while DTF transfer materials typically cost $2 to $4 per print when factoring in film, powder, and ink consumption. This translates to potential savings of 75% or more on production costs for businesses printing fewer than 50 garments weekly. The diy fabric printing process guide demonstrates how small operations maximize these savings through efficient workflow design.
Key cost advantages include:
- No equipment financing or depreciation expenses
- Minimal space requirements compared to DTF printer stations
- Lower utility costs without heat presses and curing ovens
- Reduced waste from test prints and calibration runs
- Flexibility to pause production without idle equipment costs
Pro Tip: Track your actual per-print costs including ink, paper, fabric prep materials, and electricity to accurately compare DIY methods against outsourcing or equipment investment options.
How the freezer paper method enables precise, high-quality prints
The freezer paper technique solves the fundamental challenge of fabric printing: creating a stable, flat surface that feeds smoothly through standard inkjet printers. The freezer paper adheres to fabric, creating a rigid sheet that mimics the properties of standard printer paper, suitable for multiple fabric types. This simple innovation eliminates the jamming, misalignment, and print quality issues that plague other DIY fabric printing attempts.
Freezer paper features a plastic-coated side that temporarily bonds to fabric when heated with a household iron. This coating melts slightly under heat, creating just enough adhesion to hold fabric taut without leaving residue or damaging fibers. The bond remains strong enough to withstand the mechanical stress of printer rollers yet releases cleanly after printing completes. This balance makes the method accessible to beginners while delivering results comparable to professional heat transfer processes.
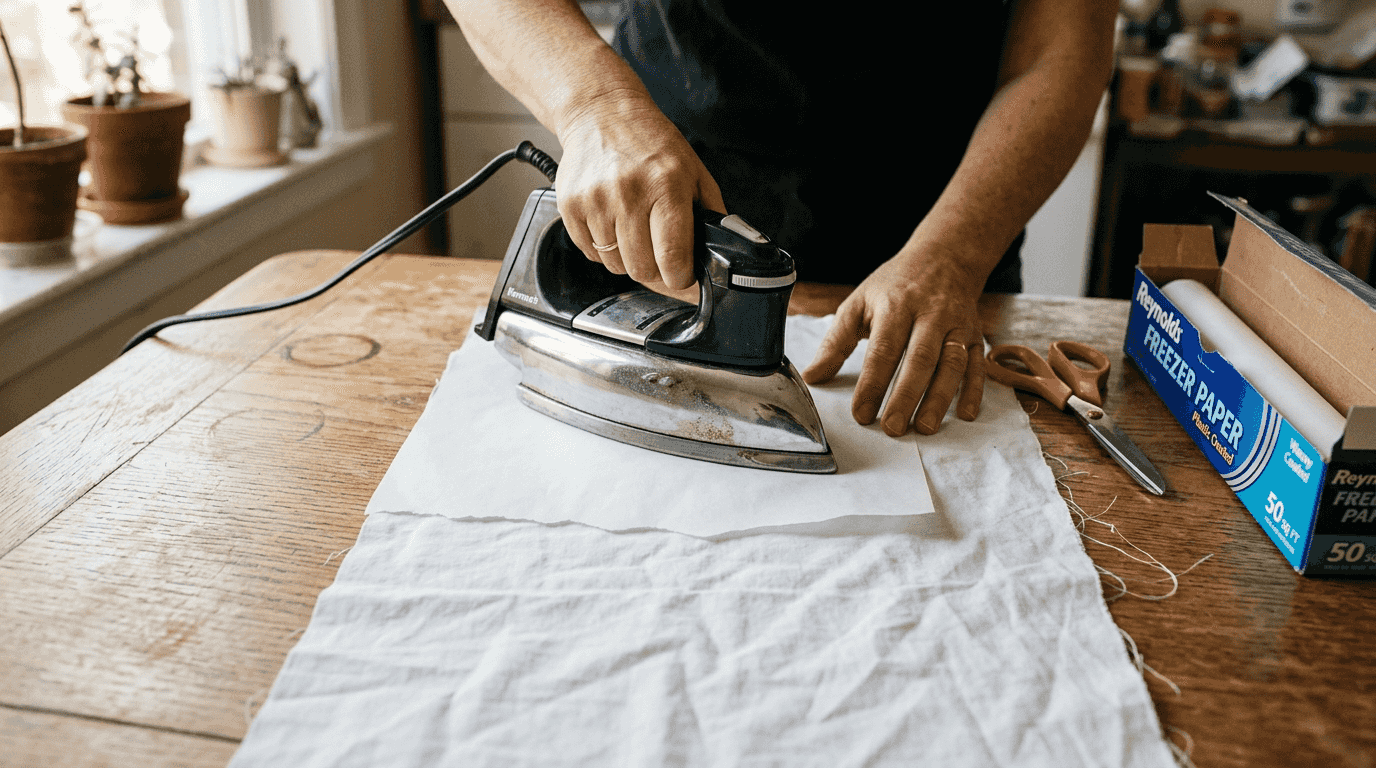
Fabric preparation determines print quality as much as the printing process itself. Pre-washing removes sizing chemicals and manufacturing residues that interfere with ink absorption and adhesion. Hot water washing followed by machine drying preshrinks the fabric, preventing distortion after the printed garment goes through its first customer wash cycle. Ironing the fabric completely flat before attaching freezer paper ensures consistent ink deposition across the entire print area, eliminating streaks and gaps that occur on wrinkled surfaces.
The method works successfully with various fabric types:
- Cotton: Absorbs pigment inks readily, producing vibrant, durable prints
- Linen: Requires extra ironing for smoothness but accepts ink well
- Cotton blends: Print quality depends on cotton percentage, aim for 80% or higher
- Silk: Produces exceptionally smooth prints but needs gentle handling
Heat-setting transforms temporary ink deposits into permanent, washable prints. Pigment-based inks contain particles that mechanically bond to fabric fibers when heat activates the binder chemicals. Setting requires sustained heat at 300°F to 350°F for 3 to 5 minutes, achieved by ironing the printed fabric on the reverse side. This process crosslinks the binder molecules, creating a polymer matrix that locks pigment particles into the fabric structure. Properly heat-set prints withstand 40 or more wash cycles without significant fading when laundered according to care instructions.
Pro Tip: Print a test swatch on scrap fabric before committing to your final piece, allowing you to verify color accuracy and ink saturation without wasting premium materials.
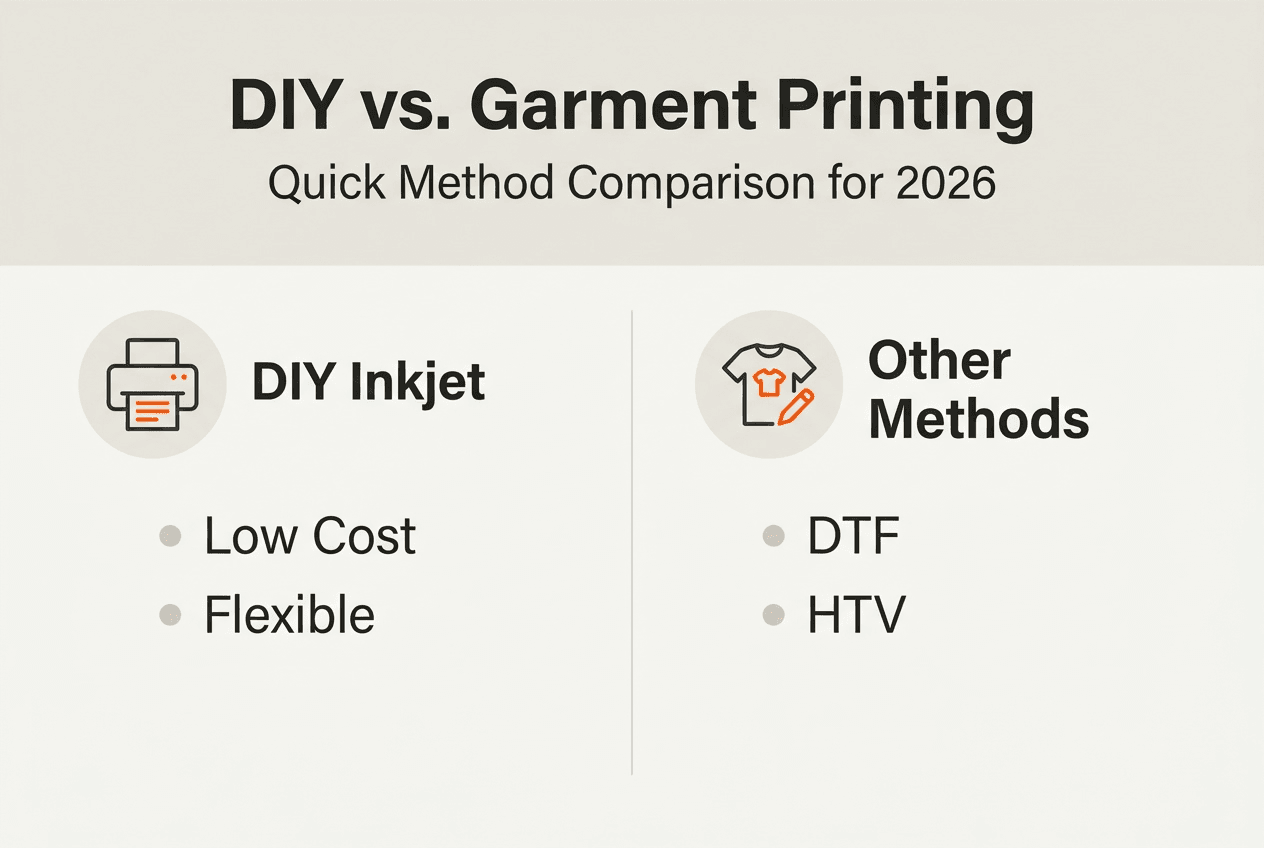
Comparing DIY printing with popular alternatives: HTV, DTF, and sublimation
Understanding how DIY fabric printing stacks up against established garment decoration methods helps you choose the right approach for your business model and production volume. Each technique offers distinct advantages and limitations that affect cost, quality, and workflow efficiency. Heat Transfer Vinyl, Direct-to-Film, and sublimation dominate the small business apparel market, making them the natural comparison points for evaluating DIY methods.
HTV offers a low entry cost but has hidden labor expenses due to weeding. The process requires cutting designs from vinyl sheets, manually removing negative space around each element, and precisely positioning pieces before heat pressing. Simple text designs take 10 to 15 minutes per garment for weeding alone. Complex graphics with fine details can consume 30 minutes or more, making HTV impractical for intricate artwork or photographic images despite its $200 to $500 equipment investment.
DTF is versatile for complex graphics and works on many fabrics; ordering ready-to-press transfers is beginner-friendly. This method excels at reproducing detailed artwork, gradients, and photographic images on virtually any fabric color or composition. However, owning DTF equipment requires significant capital investment and technical knowledge for maintenance and color management. Many small businesses opt for ordering transfers from services rather than purchasing printers, balancing quality with convenience. The dtf vs screen printing comparison reveals how transfer ordering eliminates equipment hassles while maintaining professional output.
Sublimation is cost-effective but limited to polyester or poly-coated blanks. The process produces exceptionally vibrant, permanent prints by converting solid dye into gas that penetrates polyester fibers at the molecular level. Print quality surpasses other methods for photographic reproduction and color vibrancy. The fabric limitation restricts sublimation to synthetic materials, eliminating popular cotton garments from your product line unless you source expensive polyester-cotton blends with minimum 65% polyester content.
| Method | Equipment Cost | Per-Print Cost | Fabric Compatibility | Complexity | Best For |
|---|---|---|---|---|---|
| DIY Inkjet | $0-$200 | $0.50-$1.50 | Cotton, linen, blends | Low | Small batches, custom designs |
| HTV | $200-$500 | $1-$3 | Most fabrics | Medium | Simple graphics, text |
| DTF (owned) | $3,000-$8,000 | $2-$4 | All fabrics | High | High volume production |
| DTF (ordered) | $300-$800 | $3-$6 | All fabrics | Low | Professional quality, no equipment |
| Sublimation | $400-$1,200 | $1-$2 | Polyester only | Medium | Photographic prints, all-over designs |
DIY inkjet fabric printing delivers the lowest barrier to entry and greatest flexibility for testing designs and market demand. You avoid equipment financing while maintaining the ability to produce professional-quality prints for small batch orders. The method shines for entrepreneurs validating product ideas, hobbyists creating personal projects, and small businesses serving niche markets where order volumes don’t justify expensive equipment investments.
Practical tips to maximize quality and durability in DIY garment printing
Achieving professional results with DIY fabric printing depends on mastering a few critical techniques that separate amateur attempts from commercial-quality output. These practices address the most common failure points where prints fade prematurely, colors appear washed out, or designs crack and peel after washing. Implementing these strategies transforms basic DIY printing into a reliable production method that satisfies customers and builds your reputation.
Light-colored, tightly woven cotton fabrics provide the best surface for beginners’ DIY printing due to smoothness and ink absorption. Fabric thread count directly impacts print resolution and color vibrancy. Aim for 180 to 200 thread count cotton for optimal results, as lower counts create visible gaps between threads that disrupt fine details. Higher thread counts above 250 can resist ink penetration, leading to surface deposits that wash away prematurely. White and natural cotton colors display printed designs most accurately, while light pastels work well for specific aesthetic effects.
Fabric preparation steps that ensure consistent quality:
- Wash fabric in hot water with mild detergent to remove sizing and oils
- Machine dry completely to preshrink and eliminate moisture
- Iron fabric while slightly damp for easiest wrinkle removal
- Cut fabric pieces 1 inch larger than final print area for handling margin
- Attach freezer paper with firm, even iron pressure for 10 to 15 seconds
Ink selection dramatically affects print permanence and color fastness over the garment’s lifetime. Heat-setting with an iron using pigment inks offers best fade resistance and permanence. Dye-based inks produce initially brighter colors but fade rapidly through washing and UV exposure, making them unsuitable for wearable items. Pigment inks contain solid color particles suspended in a polymer binder that mechanically bonds to fabric fibers during heat-setting. This physical attachment withstands detergents and agitation far better than dye absorption methods.
Heat-setting technique determines whether your prints survive one wash or fifty. Place a pressing cloth or parchment paper over the printed area to protect both the print and your iron’s soleplate from ink transfer. Set your iron to the cotton setting without steam, typically 300°F to 350°F. Press firmly for 30 seconds per section, moving systematically across the entire print area. Flip the fabric and repeat the process on the reverse side, where heat penetrates directly to the ink layer. This dual-sided approach ensures complete binder activation throughout the fabric thickness.
Post-printing care instructions extend print life significantly:
- Wait 24 hours after heat-setting before the first wash
- Turn garments inside out to reduce friction on printed surfaces
- Wash in cold water on gentle cycle with mild detergent
- Avoid chlorine bleach which breaks down pigment binders
- Line dry or tumble dry on low heat to prevent excessive agitation
Pro Tip: Create a care instruction card for customers explaining proper washing techniques, positioning your DIY printed items as premium products that reward proper maintenance with extended lifespan.
The dtf transfer application guide perfect results offers additional insights on achieving professional finishes that apply equally to DIY methods and commercial transfers.
Explore hassle-free DTF transfer options at DIYPRINTZ
While DIY fabric printing offers remarkable cost savings and creative control, some projects demand production capacity or specialized effects beyond home printing capabilities. Scaling your apparel business eventually requires balancing DIY flexibility with professional production efficiency. Ready-to-press DTF transfers bridge this gap perfectly, delivering commercial-quality results without the equipment investment, maintenance headaches, or technical learning curve of owning a DTF printer.
DIYPRINTZ specializes in high-volume DTF transfer production, processing hundreds to thousands of orders monthly with consistent quality and rapid turnaround. Our same day dtf transfers service ensures you never miss deadlines or disappoint customers waiting for custom apparel. The DTF transfers auto gang sheet builder streamlines your workflow by automatically arranging multiple designs for efficient production, maximizing material usage while minimizing costs. You focus on selling and fulfilling orders while we handle the technical complexities of transfer production, giving you professional results without the day-to-day hassles of printer ownership.
FAQ
What fabrics are best for DIY garment printing?
Light-colored, tightly woven cotton fabrics deliver optimal results for beginners exploring DIY garment printing methods. The smooth surface and natural absorbency of cotton allow pigment inks to penetrate evenly, creating vibrant prints with excellent detail reproduction. Pre-washed and ironed fabric further improves results by removing manufacturing chemicals and creating a perfectly flat printing surface. Thread counts between 180 and 200 offer the ideal balance of smoothness and ink absorption for most projects.
Can I use a laser printer for fabric printing?
Laser printers are not suitable for fabric printing due to high heat that can damage fabric and printer. The fuser unit in laser printers operates at temperatures exceeding 400°F to melt toner onto paper, which can scorch natural fibers and melt synthetic materials. This extreme heat also poses fire risks when flammable fabric enters the paper path. Inkjet printers remain the recommended choice for DIY fabric printing, as they apply liquid inks at room temperature without thermal damage risks.
How do I make DIY prints durable and washable?
Heat-setting with an iron bonds pigment-based ink to fabric fibers, making prints permanent and washable. The process requires sustained heat at 300°F to 350°F applied for 3 to 5 minutes total, pressing both the front and back of the printed fabric. This heat activates polymer binders in pigment inks, creating chemical crosslinks that lock color particles into the fabric structure. Properly heat-set prints withstand 40 or more wash cycles when laundered in cold water and dried on low heat settings.
What are common mistakes to avoid in DIY fabric printing?
Skipping fabric pre-washing ranks as the most common mistake, leaving sizing chemicals that prevent proper ink adhesion and absorption. Using dye-based inks instead of pigment formulations results in rapid fading after just a few washes. Inadequate heat-setting time or temperature fails to activate binder polymers, causing prints to wash out prematurely. Printing on dark fabrics without specialty treatments produces barely visible results, as standard inkjet inks lack the opacity to show against dark backgrounds. Always test your complete process on scrap fabric before printing final pieces.