

DTF Printing Troubleshooting Guide for Perfect Transfers
Unlock flawless results with this dtf printing troubleshooting guide. Follow easy, step-by-step actions to resolve issues and ensure high-quality transfers every time.

Frustrated by unpredictable transfer results or wasted shirts in the middle of a busy production week? For apparel businesses across the United States, Canada, Australia, and beyond, getting consistent results from DTF printing means more reliable orders and better customer reviews. A sharp focus on accurate quality control and equipment maintenance lets your shop solve issues before they become costly mistakes, keeping transfers vibrant and dependable for every customer.
Table of Contents
- Step 1: Assess Common DTF Transfer Issues
- Step 2: Inspect and Optimize Printing Equipment
- Step 3: Adjust DTF Print Settings for Best Results
- Step 4: Test and Verify Transfer Quality
Quick Summary
| Key Insight | Explanation |
|---|---|
| 1. Identify Transfer Issues Early | Examine transfers under good lighting to find common problems like color fading and poor adhesion before troubleshooting. |
| 2. Maintain Your Printing Equipment | Regularly check key printer components, including printhead and calibration, to ensure optimal performance and quality. |
| 3. Adjust Print Settings for Quality | Fine-tune settings such as ink density and print resolution to achieve the best transfer results tailored to your designs. |
| 4. Conduct Thorough Quality Tests | Perform visual, adhesive, and flex tests on sample transfers before shipping to ensure they meet quality standards. |
| 5. Document Everything Consistently | Keep logs of settings, tests, and observations to help identify and resolve recurring issues efficiently. |
Step 1: Assess Common DTF Transfer Issues
Before you troubleshoot, you need to identify what’s actually going wrong with your transfers. Not every problem looks the same, and pinpointing the real issue saves you time and money.
Start by examining your transfers under good lighting. Look for these common problems:
- Color fading or dullness after pressing
- Incomplete ink coverage with white or light spots
- Cracks in the design when flexed or worn
- Poor adhesion where the transfer peels away from fabric
- Ink bleeding at design edges creating fuzzy lines
- Wrinkles or air bubbles trapped under the film
Take a close look at where the problem appears. Is it across the entire transfer, or just in certain areas? Are edges sharp or soft? Does the ink sit on top of the fabric or feel bonded into it?
The location and pattern of defects tell you exactly what went wrong. If you see color loss only in dark areas, that’s one issue. If adhesion fails uniformly across the whole transfer, that points to something different entirely.
Document what you see. Take photos if possible. Compare transfers from the same batch to spot patterns. This makes it much easier to identify whether the problem started during printing, during DTF transfer application, or during pressing.
Check the fabric too. Is it synthetic or natural? Heavily textured or smooth? Some fabrics absorb ink differently, and that affects how the transfer looks after pressing.
Here’s a quick reference for common DTF transfer issues and their typical root causes:
| DTF Transfer Issue | Likely Root Cause | Suggested Troubleshooting Step |
|---|---|---|
| Color fading or dullness | Incorrect ink density or overheating | Adjust print settings; verify heat press temperature |
| Incomplete ink coverage | Printhead clog or height miscalibration | Run nozzle check; calibrate printhead |
| Cracks in the design | Excessive ink density or poor substrate | Lower density; check fabric compatibility |
| Poor adhesion | Insufficient pressure or contamination | Clean platen; increase pressure; verify fabric type |
| Ink bleeding | Low resolution or wrong color profile | Increase DPI; match color profile |
| Wrinkles/air bubbles | Uneven heat bed or poor film placement | Level platen; apply film smoothly |
Accurate identification prevents you from fixing the wrong problem and wasting more transfers and time.
Pro tip: Create a simple quality checklist with photos of acceptable versus defective transfers so your entire team can spot issues consistently and catch problems early before pressing customer orders.
Step 2: Inspect and Optimize Printing Equipment
Your DTF printer is the heart of quality transfers. If the equipment isn’t running optimally, no amount of troubleshooting downstream will fix the problem. This step focuses on keeping your printer in peak condition.
Start with the printhead, which is the most critical component. Run a nozzle check test regularly to spot clogs before they ruin prints. If you see missing lines or gaps in the test pattern, perform a printhead cleaning cycle immediately.
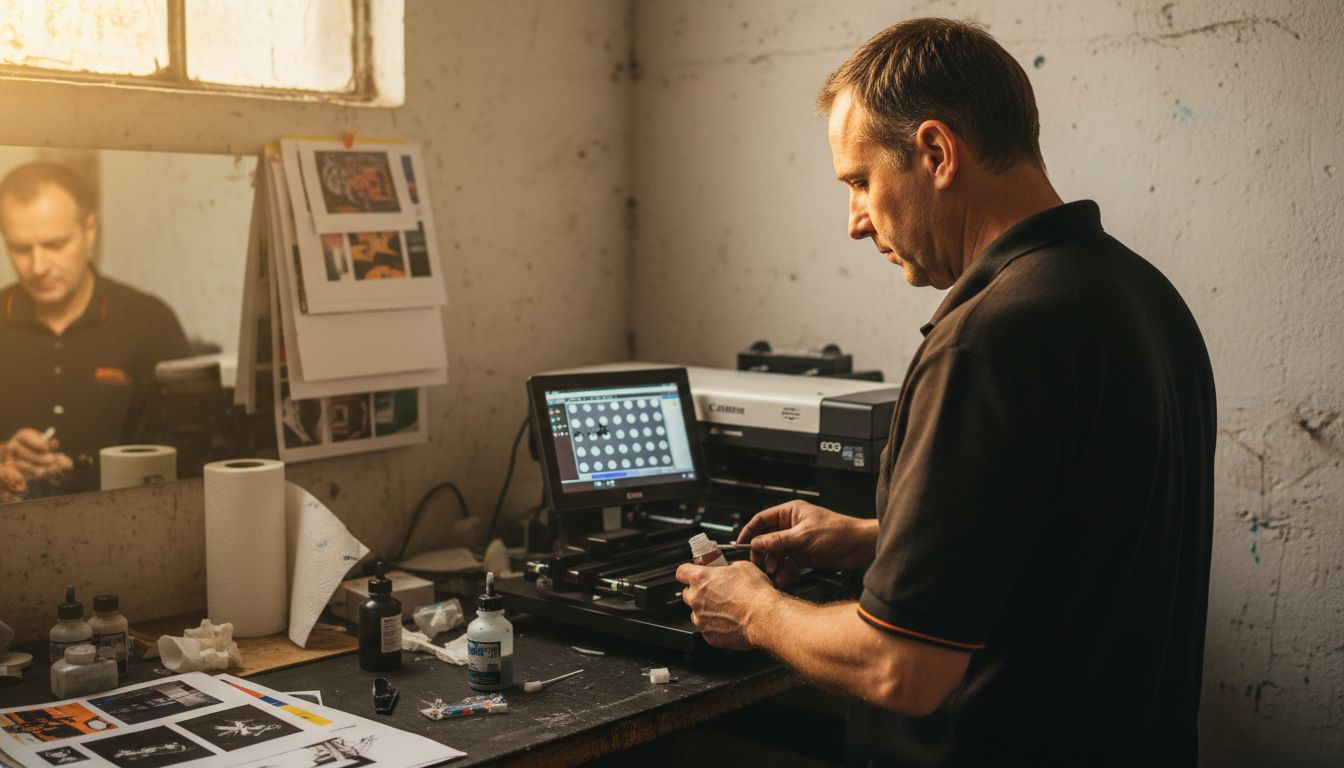
Next, verify your printhead height calibration. The distance between the printhead and substrate directly affects ink placement and coverage. Too high, and you get weak color. Too low, and you risk physical contact damage. Check the manufacturer’s specifications for your exact model.
Inspect these critical maintenance areas:
- Capping station for dried ink buildup
- Ink lines and tubes for clogs or air bubbles
- Ink cartridges for proper seating and fill levels
- Encoder strip for dust or debris
- Platen or heat bed for warping or uneven surface
Control your environment too. Maintaining proper humidity and temperature prevents ink from drying in the system and keeps piezoelectric printheads functioning smoothly. Aim for 45-55% humidity and 68-72°F for consistent results.
Check ink agitation settings daily. Pigment settling causes color inconsistency and weak prints. Make sure your system actively stirs the ink reservoir on schedule.
Equipment maintenance is preventative medicine for your printer—it stops problems before they start.
Pro tip: Create a daily maintenance log where your team checks nozzles, cleans the capping station, and verifies temperature and humidity, so problems get caught immediately instead of ruining a batch of customer orders.
Step 3: Adjust DTF Print Settings for Best Results
Your printer settings control everything from color saturation to ink thickness. Small adjustments here can transform a mediocre transfer into a perfect one. This step walks you through the critical settings that matter most.
Start by understanding your ink density setting. This controls how much pigment deposits onto the film. Too low, and colors look washed out. Too high, and you get over-saturation that cracks and flakes after pressing. Most DTF printing works well between 80 to 100 percent density, but your specific material and design may need tweaking.
Next, check your print resolution. Higher resolution (720 or 1440 DPI) produces sharper edges and smoother gradients, but takes longer and uses more ink. Lower resolution (360 DPI) works fine for bold graphics with solid colors. Match your resolution to your actual design complexity rather than always maxing it out.
Adjust these key settings systematically:
- Color profile to match your specific ink type and pretreatment formula
- Dot size and gain to control how ink spreads on film
- Print speed to balance quality against production time
- Micro adjustments to fix color shifts or alignment issues
White ink needs special attention. Run it through separate nozzles with its own settings because white pigment behaves differently than colored inks. Most successful shops run white at 90 to 110 percent density depending on coverage goals.
Compare key DTF print settings and their impact:
| Setting | Effect on Output | When to Adjust |
|---|---|---|
| Ink density | Controls color strength | If colors look washed out or oversaturated |
| Print resolution | Determines edge sharpness | For designs with fine details or gradients |
| Print speed | Production rate vs. quality | When balancing throughput with quality |
| White ink density | Ensures opacity on dark fabrics | For designs needing crisp white coverage |
Test your settings on scrap film before running full orders. Reference the DTF printing checklist to verify you’ve covered all adjustment points. Create test prints with color blocks, gradients, and fine detail lines to evaluate sharpness and saturation.
Perfect settings are unique to your ink brand, pretreatment, and equipment—copying another shop’s numbers wastes time and transfers.
Pro tip: Keep a settings log for each ink type and design style you run, documenting density, resolution, and speed so you can quickly recall winning combinations instead of guessing every time a similar order arrives.
Step 4: Test and Verify Transfer Quality
Testing transfers before you send them to customers prevents costly returns and protects your reputation. This step ensures every transfer meets your quality standards and performs reliably after pressing.
Start by pulling a sample from your production batch. Don’t just glance at it. Conduct a thorough visual inspection under bright lighting. Look for sharp design edges, consistent color saturation, and uniform ink coverage with no thin spots or over-application.
Check registration accuracy and color consistency across the entire design. Multi-color prints should show no color bleeding at edges. White ink should lay clean and opaque without showing fabric texture underneath. If you see registration misalignment, stop the batch and recalibrate your printer before continuing.
Perform these critical quality tests:
- Flex test by gently bending the transfer to check for cracks or ink separation
- Adhesion test by attempting to peel back a corner of the film
- Color evaluation under natural and artificial light to spot inconsistencies
- Fine detail test examining thin lines and small text for sharpness
- White opacity test by checking coverage on darker film areas
Press a test transfer onto scrap fabric using your standard heat press settings. This reveals how the transfer performs in real conditions. After pressing and cooling, flex and wash the garment to verify durability. Poor transfers fail this stage immediately.
Document your findings. Note batch numbers, settings used, and any defects observed. Maintain standardized protocols so every team member catches problems consistently.
Quality control catches problems before they reach customers, saving money and building trust.
Pro tip: Set up a quality control station with a light box, test press, and inspection checklist so every batch gets the same rigorous evaluation before shipping, preventing mistakes that damage your business reputation.
Simplify Your DTF Printing Troubles with Expert Transfer Solutions
If troubleshooting color fading cracking or poor adhesion in your DTF transfers feels overwhelming our trusted transfer printing services at DIY Printz are designed to take those pain points off your hands. Instead of battling printhead clogs or complex ink density adjustments you can rely on hundreds of consistent high-quality transfers delivered fast and ready to press. This means no more wasted materials or hours spent diagnosing equipment issues.
Ready to stop struggling with transfer defects and start scaling your print business without the hassle? Visit our main site at DIY Printz to explore how we handle every step from precise printing to quality control. Learn more about our stress-free process in the DTF Transfer Application Guide and get set up to produce perfect transfers reliably today.
Frequently Asked Questions
What are the common issues that can occur during DTF printing transfers?
Common issues during DTF printing transfers include color fading, incomplete ink coverage, cracks in the design, poor adhesion, ink bleeding, and trapped air bubbles. Examine your transfers carefully under bright light to identify these problems accurately.
How can I troubleshoot color fading in my DTF transfers?
To troubleshoot color fading, check your printer’s ink density settings and ensure the heat press temperature is correct. Adjust the ink density to between 80 to 100 percent and verify your heat press settings immediately to improve color saturation.
What should I do if my DTF transfers are peeling away from the fabric?
If your DTF transfers are peeling, inspect for insufficient pressure during application and contamination on the transfer or fabric. Increase the heat press pressure and ensure both the platen and the transfer surface are clean to enhance adhesion.
How can I improve print quality for DTF transfers?
To improve print quality, adjust your settings for ink density, print resolution, and micro adjustments for color shifts. Aim for a print density of around 80 to 100 percent and check for a print resolution of at least 720 DPI to enhance the overall output.
What steps should I take to ensure proper maintenance of my DTF printer?
Regular maintenance of your DTF printer includes running nozzle check tests, cleaning the capping station, and calibrating the printhead height. Perform these checks daily to keep your printer in optimal condition and prevent clogs or quality issues.
How can I test the quality of my DTF transfers before sending them to customers?
To test the quality, conduct a visual inspection and perform flex and adhesion tests on a sample transfer. After pressing, check for durability by flexing the transfer and evaluating color consistency to ensure it meets your quality standards.
Recommended
- DTF Transfer Application Guide for Perfect Results – DIYPRINTZ
- Custom Apparel Printing Guide for Easy DTF Transfers – DIYPRINTZ
- 7 Essential Steps for a Complete DTF Printing Checklist – DIYPRINTZ
- DTF Transfer Workflow Guide for Custom Apparel Success – DIYPRINTZ
- Design vs Print: Why Stunning Files Fail in Production – BcardsCreation
- 7 Essential Tips for Using a Dye Sublimation Service – Bettermockups
READY TO PRINT?
Send us your artwork and we'll dial in your DTF transfer, color, and same-day turnaround.


